WARNING: Currently VPC-native is not the default mode during cluster creation. In the future, this will become the default mode and can be disabled using --no-enable-ip-ali as flag. Use --[no-]enable-ip-alias flag to suppress this warning. WARNING: Newly created clusters and node-pools will have node auto-upgrade enabled by default. This can be disabled using the --no-enable-autoupgrade flag. WARNING: Starting in 1.12, default node pools in new clusters will have their legacy Compute Engine instance metadata endpoints disabled by default. To create a cluster with legacy instance metadata endpoints disabled in the default node pool, run clusters create with the flag --metadata disable-legacy-endpoints=true. WARNING: Your Pod address range (--cluster-ipv4-cidr) can accommodate at most 1008 node(s). This will enable the autorepair feature for nodes. Please see https://cloud.google.com/kubernetes-engine/docs/node-auto-repair for more information on node autorepairs. ERROR: (gcloud.container.clusters.create) ResponseError: code=403, message=Kubernetes Engine API is not enabled for this project. Please ensure it is enabled in Google Cloud Console and try again: visit https://console.cloud.google.com/apis/api/container.googleapis.com/overview?project=elated-ranger-26 to do so.
hello-app ver 1.0 이다. dockerfile 을 확인하면 컨테이너 설정을 확인할수 있다.
kubectl expose 를 이용하여 생성한 파일을 노출한다.
@cloudshell:~/hello-app (jth3434-197516)$ kubectl get pods NAME READY STATUS RESTARTS AGE hello-server-64db4d4dc7-xtrcd 1/1 Running 0 12m @cloudshell:~/hello-app (jth3434-197516)$ kubectl get service hello-server NAME TYPE CLUSTER-IP EXTERNAL-IP PORT(S) AGE hello-server LoadBalancer 10.35.255.80 35.223.145.93 80:30201/TCP 5m30s
그리고 get pads 으로 pads 의 상태를 확인하고 서비스를 확인해서 정상적으로 external-ip로 접속했을때 접속이 되면 정상이다.
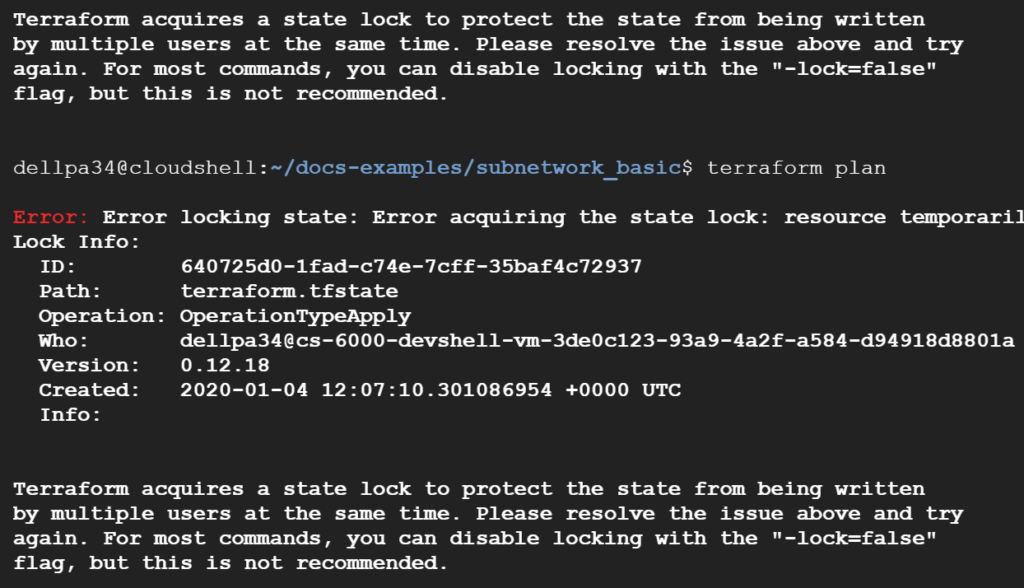
dellpa34@cloudshell:~/docs-examples/subnetwork_basic$ terraform plan Error: Error locking state: Error acquiring the state lock: resource temporarily unavailable Lock Info: ID: 640725d0-1fad-c74e-7cff-35baf4c72937 Path: terraform.tfstate Operation: OperationTypeApply Who: dellpa34@cs-6000-devshell-vm-3de0c123-93a9-4a2f-a584-d94918d8801a Version: 0.12.18 Created: 2020-01-04 12:07:10.301086954 +0000 UTC Info: Terraform acquires a state lock to protect the state from being written by multiple users at the same time. Please resolve the issue above and try again. For most commands, you can disable locking with the "-lock=false" flag, but this is not recommended.
테스트중에 캔슬 한번했더니 프로세스가 종료되지 않아서 자꾸 -lock=false 옵션을 주라고 떳다. 귀찮아서 그냥 죽였다. kill -9 4120
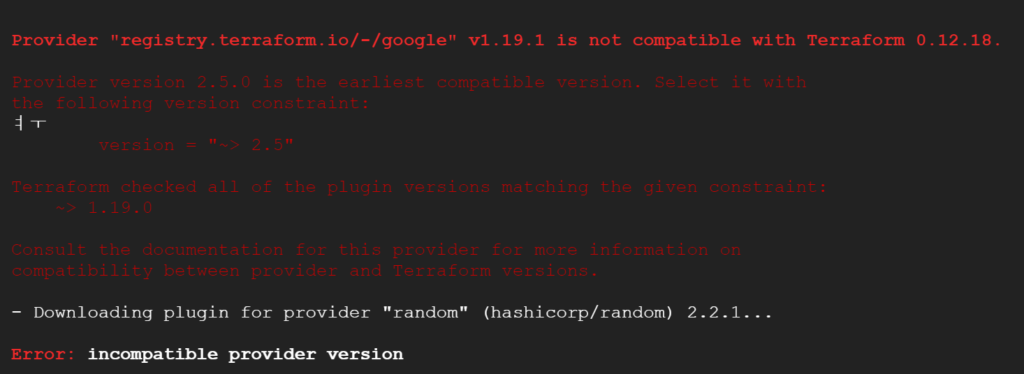
Provider "registry.terraform.io/-/google" v1.19.1 is not compatible with Terraform 0.12.18. Provider version 2.5.0 is the earliest compatible version. Select it with the following version constraint:
version = "~> 2.5" Terraform checked all of the plugin versions matching the given constraint: ~> 1.19.0 Consult the documentation for this provider for more information on compatibility between provider and Terraform versions. Downloading plugin for provider "random" (hashicorp/random) 2.2.1… Error: incompatible provider version
error 는 backing_file.tf 파일에서 발생하고 있었다. 간단하게 version 차이..
provider.google v2.20.1 로 1.19보다 많이 높은 상태였다. 일단 진행해 보기로 했으니.. backing_file.tf 수정
provider "google" { version = "~> 1.19.0" region = "us-central1" zone = "us-central1-c" }
provider "google" { version = "~> 2.5" region = "us-central1" zone = "us-central1-c" }
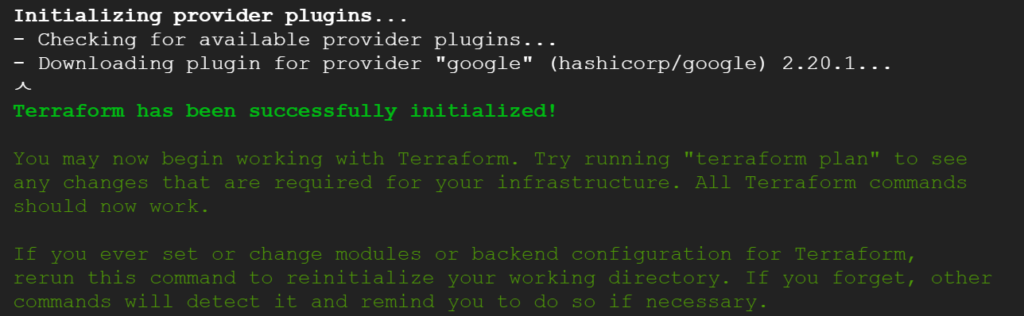
수정후에 다시 terraform init 을 실행 하였다.
Initializing provider plugins… Checking for available provider plugins… Downloading plugin for provider "google" (hashicorp/google) 2.20.1… Terraform has been successfully initialized! You may now begin working with Terraform. Try running "terraform plan" to see any changes that are required for your infrastructure. All Terraform commands should now work. If you ever set or change modules or backend configuration for Terraform, rerun this command to reinitialize your working directory. If you forget, other commands will detect it and remind you to do so if necessary.
정상적으로 실행 되는것을 확인하였다.
init 후에 apply 하니 다시 Warning 과 함께 error 가 발생하였다.
Warning: Interpolation-only expressions are deprecated on main.tf line 9, in resource "google_compute_instance" "instance": 9: image = "${data.google_compute_image.debian_image.self_link}"Error: Error loading zone 'us-central1-a': googleapi: Error 403: Access Not Configured. Compute Engine API has not been used in project 45002 before or it is disabled. Enable it by visiting https://console.developers.google.com/apis/api/compute.googleapis.com/overview?project=304102002 then retry. If you enabled this API recently, wait a few minutes for the action to propagate to our systems and retry., accessNotConfigured on main.tf line 1, in resource "google_compute_instance" "instance": 1: resource "google_compute_instance" "instance" {
이건 이전에도 겪은 케이스 같다...functions api 셋팅할때 발생한 거였는데...googleapi 관련 에러다. cloudshell 에서 컴퓨팅쪽의 api를 사용할 수 없어서 발생하는 에러로 로그에 보이는 페이지로 이동해서 그냥 허용해 준다.
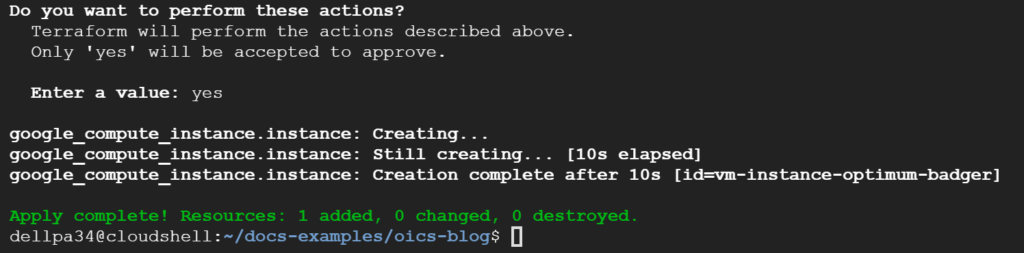
Enter a value: yes google_compute_instance.instance: Creating… google_compute_instance.instance: Still creating… [10s elapsed] google_compute_instance.instance: Creation complete after 10s [id=vm-instance-optimum-badger] Apply complete! Resources: 1 added, 0 changed, 0 destroyed.
허용후에 다시 terraform apply 를 치면 정상적으로 실행이 된다. 그럼 확인해 보자.
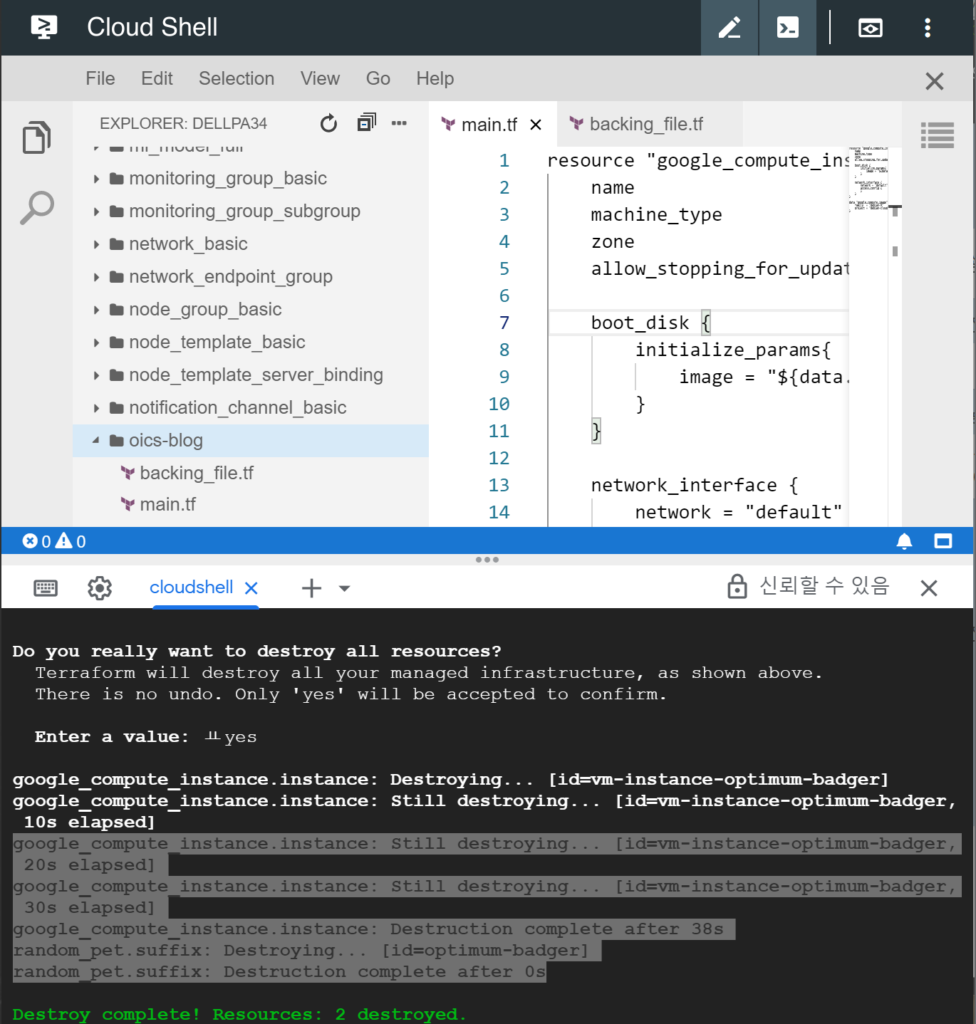
인스턴스가 생성이 됬다. 그렇다면 이젠 간단히 생성하는것 까지 완료했으므로. 이젠 기본 템플릿을 이용한 구성을 만들것이다. 생성한 테라폼은 terraform destroy 명령어로 삭제 했다.
google_compute_instance.instance: Destroying… [id=vm-instance-optimum-badger] google_compute_instance.instance: Still destroying… [id=vm-instance-optimum-badger, 10s elapsed] google_compute_instance.instance: Still destroying… [id=vm-instance-optimum-badger, 20s elapsed] google_compute_instance.instance: Still destroying… [id=vm-instance-optimum-badger, 30s elapsed] google_compute_instance.instance: Destruction complete after 38s random_pet.suffix: Destroying… [id=optimum-badger] random_pet.suffix: Destruction complete after 0s
정상적으로 삭제되는것을 확인할수 있었다.
gcp cloud shell 에서 terraform 을 사용하는 방법을 테스트해 보았다. 다음엔 VPC 구성과 인스턴스 그룹 생성 로드벨런서 구성까지 한방에 진행할것이다.
여담으로 cloud shell은 진짜 강력한 도구이다.
스크린샷과 같이 shell을 지원하면서 동시에 에디터도 지원한다.
vi 에 익숙한 나같은경우에는 그냥 vi 로 작업하지만 익숙하지 않은 사용자의 경우에는 우와할정도다..
hoceneco@cloudshell:~ (sage-facet-22972)$ sudo gcloud components update Your current Cloud SDK version is: 274.0.0 You will be upgraded to version: 274.0.1 ┌──────────────────────────────────────────────────┐ │ These components will be updated. │ ├──────────────────────────┬────────────┬──────────┤ │ Name │ Version │ Size │ ├──────────────────────────┼────────────┼──────────┤ │ Cloud SDK Core Libraries │ 2019.12.27 │ 12.7 MiB │ └──────────────────────────┴────────────┴──────────┘
gcloud 구성요소를 업데이트한다 - 꼭할필요는 없다.
오늘 미션에서 필요한 준비물은 Cloud Functions, Google Cloud Vision API, ImageMagick, Cloud Storage 이렇게 다.
git clone https://github.com/GoogleCloudPlatform/nodejs-docs-samples.git 명령어를 이용하여 test code를 다운받고 다운받은 디렉토리로 이동한다. 일단 먼저 테스트하는것은 아래 Docs 를 참고하여 진행하였다.
이미지 업로드가 끝나면 functionc로그를 확인하면 정상작동됬는지 확인할수 있다. 첫번째 업로드에선 api 에러가 발생했는데. 이때 콘솔에서 api 를 사용할수 있도록 설정해줬다.
E blurOffensiveImages 909862418886020 2019-12-28 03:42:15.967 Error: 7 PERMISSION_DENIED: Cloud Vision API has not been used in project 300346160521 before or it is disabled. Enable it by visiting https://console.developers.google.com/apis/api/vision.googleapis.com/overview?project= then retry. If you enabled this API recently, wait a few minutes for the action to propagate to our systems and retry. at Object.callErrorFromStatus (/srv/node_modules/@grpc/grpc-js/build/src/call.js:30:26) at Http2CallStream.call.on (/srv/node_modules/@grpc/grpc-js/build/src/client.js:96:33) at emitOne (events.js:121:20) at Http2CallStream.emit (events.js:211:7) at process.nextTick (/srv/node_modules/@grpc/grpc-js/build/src/call-stream.js:97:22) at _combinedTickCallback (internal/process/next_tick.js:132:7) at process._tickDomainCallback (internal/process/next_tick.js:219:9) D blurOffensiveImages 909862418886020 2019-12-28 03:42:16.027 Function execution took 570 ms, finished with status: 'error'
D blurOffensiveImages 909862418886020 2019-12-28 03:42:16.027 Function execution took 570 ms, finished with status: 'error' D blurOffensiveImages 909865384788642 2019-12-28 03:47:22.883 Function execution started I blurOffensiveImages 909865384788642 2019-12-28 03:47:28.294 Analyzing zombie-949916_1280.jpg. I blurOffensiveImages 909865384788642 2019-12-28 03:47:29.696 Detected zombie-949916_1280.jpg as inappropriate. I blurOffensiveImages 909865384788642 2019-12-28 03:47:30.683 Downloaded zombie-949916_1280.jpg to /tmp/zombie-949916_1280.jpg. I blurOffensiveImages 909865384788642 2019-12-28 03:47:40.091 Blurred image: zombie-949916_1280.jpg I blurOffensiveImages 909865384788642 2019-12-28 03:47:40.414 Uploaded blurred image to: gs://gs://linuxer-convert/zombie-949916_1280.jpg D blurOffensiveImages 909865384788642 2019-12-28 03:47:40.419 Function execution took 17551 ms, finished with status: 'ok' D blurOffensiveImages 909860416701916 2019-12-28 03:51:04.290 Function execution started I blurOffensiveImages 909860416701916 2019-12-28 03:51:04.295 Analyzing zombie-949916_1280.jpg. I blurOffensiveImages 909860416701916 2019-12-28 03:51:05.663 Detected zombie-949916_1280.jpg as inappropriate. I blurOffensiveImages 909860416701916 2019-12-28 03:51:06.283 Downloaded zombie-949916_1280.jpg to /tmp/zombie-949916_1280.jpg.
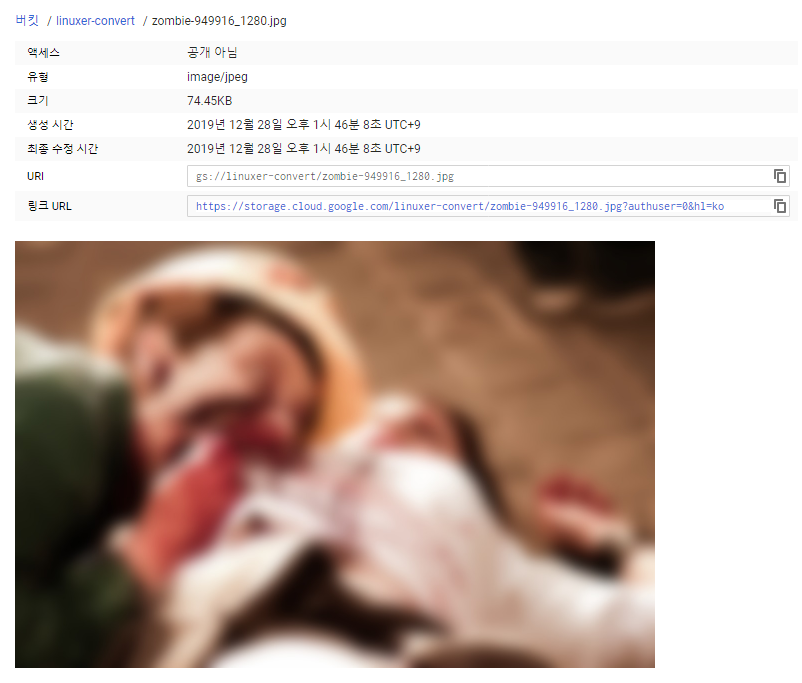
정상적으로 컨버팅이 된거다.
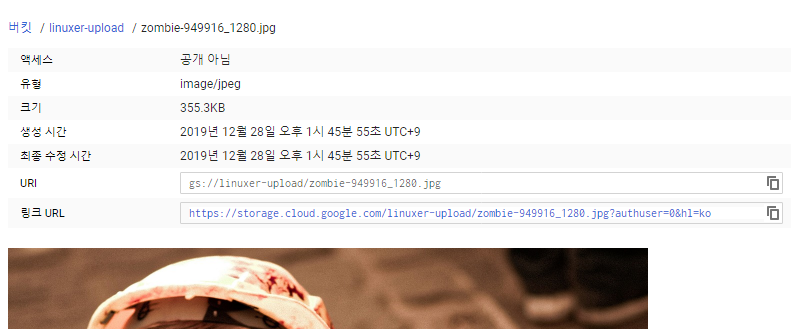
원본
블러처리된것.
자동으로 블러 처리가 완료된것을 확인할수 있다.
오늘의 미션은 resize이므로 resize를 하기위해선 index.js를 수정해야한다. 오늘의 실습에선 GraphicsMagick for node.js 을 이용해서 테스트를 진행했으므로 아주 수월했다. 원래사용한 blur 부분만 수정하면 될거 같았다.
blur Accepts a radius and optional sigma (standard deviation). gm("img.png").blur(radius [, sigma])
옵션은 위와 같고
resize Resize the image. options %, @, !, < or > see the GraphicsMagick docs for details gm("img.png").resize(width [, height [, options]]) To resize an image to a width of 40px while maintaining aspect ratio: gm("img.png").resize(40) To resize an image to a height of 50px while maintaining aspect ratio: gm("img.png").resize(null, 50) To resize an image to a fit a 40x50 rectangle while maintaining aspect ratio: gm("img.png").resize(40, 50) To override the image's proportions and force a resize to 40x50: gm("img.png").resize(40, 50, "!")
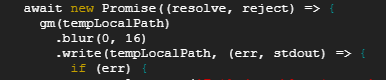
그러니까
이부분을 .blur(0, 16) 부분을 resize 옵션으로 변경만 하면되는것이다.
.resize(200, 200) 으로 수정을 하였다. 그리고 functions deploy 하고
gcloud functions deploy blurOffensiveImages --runtime nodejs8 --trigger-bucket=gs://linuxer-upload --set-env-vars BLURRED_BUCKET_NAME=gs://linuxer-convert Deploying function (may take a while - up to 2 minutes)…done. availableMemoryMb: 256 entryPoint: blurOffensiveImages environmentVariables: BLURRED_BUCKET_NAME: gs://linuxer-convert eventTrigger: eventType: google.storage.object.finalize failurePolicy: {} resource: projects/_/buckets/linuxer-upload service: storage.googleapis.com labels: deployment-tool: cli-gcloud name: projects/sage-facet-22972/locations/us-central1/functions/blurOffensiveImages runtime: nodejs8 serviceAccountEmail: sage-facet-22972@appspot.gserviceaccount.com sourceUploadUrl: https://storage.googleapis.com/gcf-upload-us-central1-ede08b3c-b370-408b-ba59-95f296f2e3e/4a80effd-0371-4317-8651-0416cffc0563.zip?GoogleAccessId=service-300346160521@gcf-admin-robot.iam.gserviceaccount.com&Expires=1577519172&Signature=CrNrgjDfo8gsr%2FoeGkcEiRvnMskkK5J4JHRoDMyh9DpXnXmp4ivWOlRsQ136GL9iK4FBvsxmAtIby4WgTECry4dYU%2FN6UkfjZSBLVtzJnJxR%2F5h7ZLY9PMd%2BDYcV1AAVbw9i1paFgBNjAq1WhNiMmmXonFBpyRHBlqMLn4CKuW7QAmA7NXOugTpQY3b%2BQ9E1ia9uIZtNwqcKfv1C1GM8e2%2FdKhMwwlUPU2EYy9gb4nirHvsdrYbzdewabmPwlRtgq1b2wTjWiuMM53vO9fDy6skNaB58tqumSfUeHM%2FTrjQrlqGejjon2cx9IlH9xF5kGKfLGzBesXEHj%2B6K6ZqilA%3D%3D status: ACTIVE timeout: 60s updateTime: '2019-12-28T07:17:00Z' versionId: '5'
정상적으로 생성이 되면 업로드를 진행하였다.
D blurOffensiveImages 909966712855810 2019-12-28 07:17:16.904 Function execution started I blurOffensiveImages 909966712855810 2019-12-28 07:17:17.003 Analyzing zombie-949916_1280.jpg.
functions 이 정상적으로 실행이 완료되고
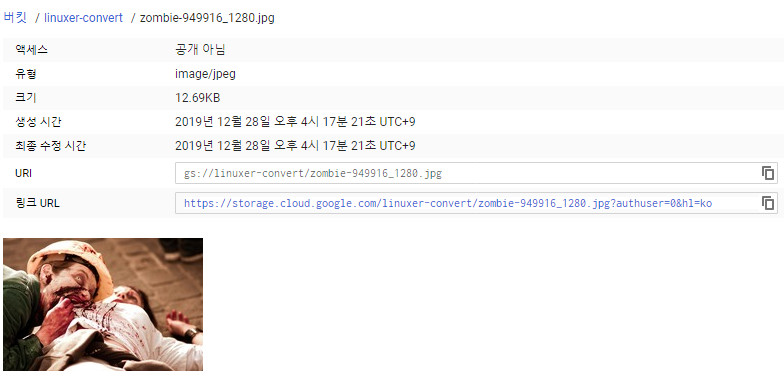
이미지가 리사이즈 되는것을 확인할수 있었다. 355.3KB -> 12.69KB로 작아졌다. 물론이미지 사이즈도..
1.Pub pri.db네트워크 만들고 2.elb설정해오기 .서버는 private만 존재 3.nat도 만들고 서버에서 인터넷접속 확인하기까지.
가 일단 나는 목표인데 청개구리 속성상 미션대로 진행할리가 없다 나는..
먼저 구글은 bastion host 가 대부분의 구성도에서 빠져있다. 외부IP가 없는 상태로 pri 에 속한 네트웤에도 gcp console로 접속을 할수 있는것. 어떤 원리도 작동되는것인지 먼저 파봐야 겠다.
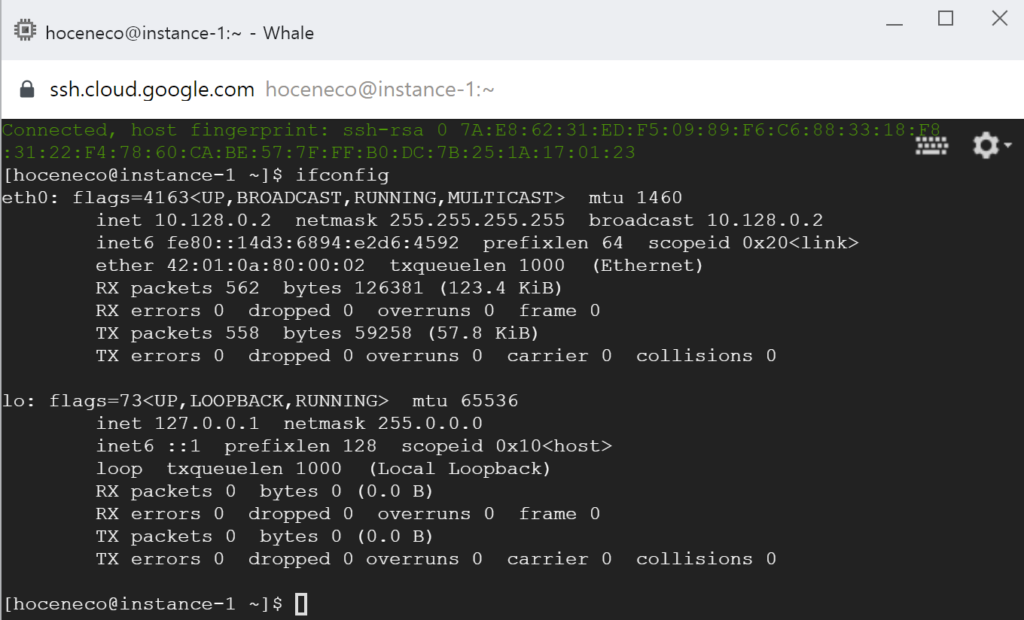
외부IP는 없는상태이다. 방화벽에서 22번만 any 로 열어준 상태로
ssh 가 붙는다. ????? ssh가 맞는지 확인해본다.
다른 세션을 이용하거나 에이전트 방식일줄 알았으나 아니다. 외부의 접속을 받는 상태인거다. 이상태라면 aws 식으로 말하자면 igw 에 연결되어있는 퍼블릭상태에서 퍼블릭IP만 없는 요상한 상태인것으로 정확한 의미에서 망분리가 아닌것이다.
그렇다면 일단 정확한 망분리를 진행해 보기로 하였다.
외부로 핑이 간다. 그렇다는건 인터넷으로 연결된 라우팅을 가지고 있다는것!
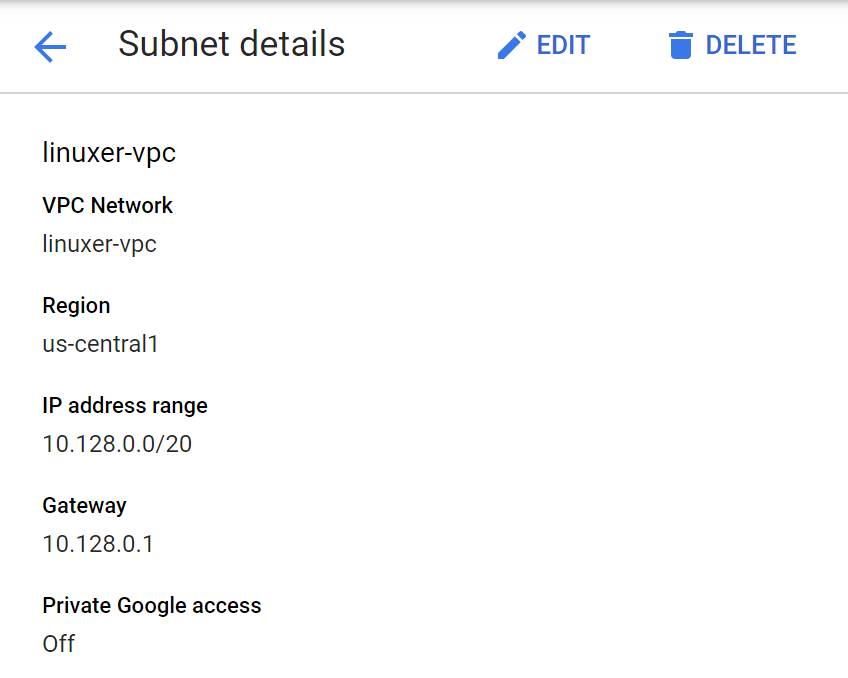
그렇지만 Private google access 를 껏다 키며 테스트를 진행해 보았으나 결과는 같았다.
[hoceneco@instance-1 ~]$ ping google.comPING google.com (74.125.124.113) 56(84) bytes of data.
ping 이 외부의 IP를 정상적으로 가져온다. 그럼 인터널 DNS가 존재하는 걸까?
internal dns 가 존재하는걸 확인했다. 내부 DNS 가 응답하므로 IP만 가져오는것이다. 그렇지만 이게 완벽하게 Private subnet인지는 알수없다.
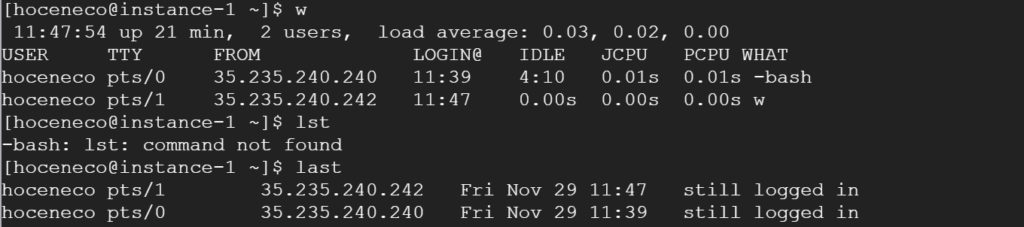
$ last
hoceneco pts/1 35.235.240.242 Fri Nov 29 11:47 still logged in
hoceneco pts/0 35.235.240.240 Fri Nov 29 11:39 still logged in
reboot system boot 4.18.0-80.11.2.e Fri Nov 29 11:26 still running
외부에서 접근 IP가 찍히기 때문. 고민이 많이되었다. Private subnet 이여야 DB를 생성할수 있는 기반이 생기는것인데 구글에선 인스턴스가 에이전트로 통신하는 방식이 아닌 ssh 를 사용하기떄문에 nat를 사용하여 인스턴스 까지 도달한다 생각하므로 일반적인 망분리의 기준에서 매우 벗어나는 것이다.
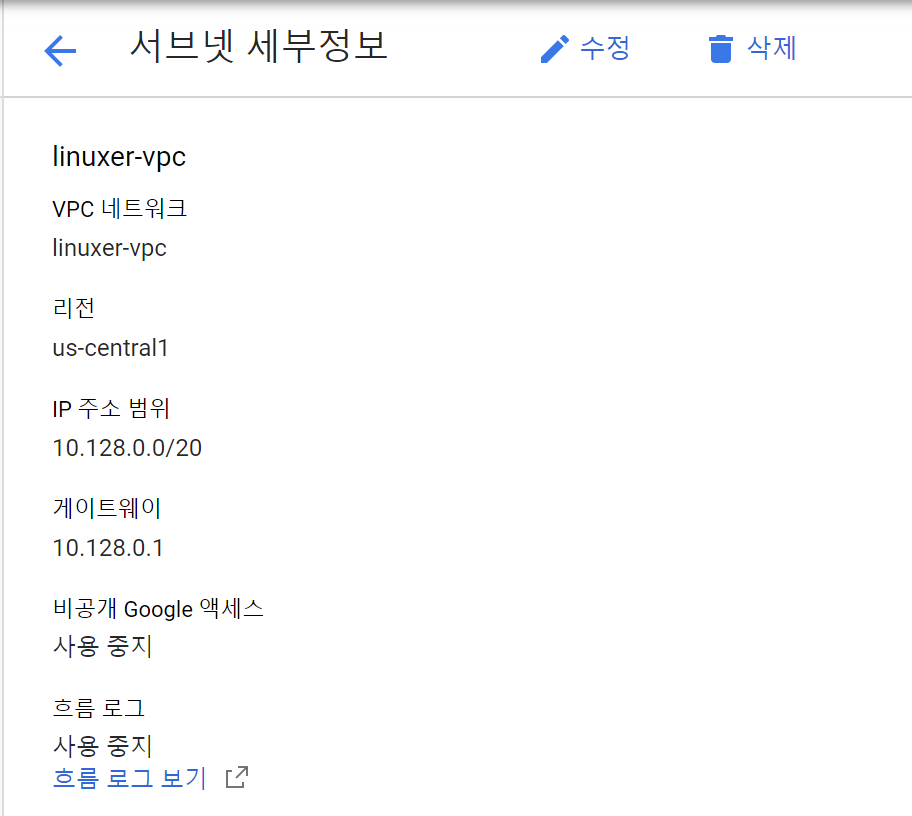
비공개 Google 액세스를 사용하면 비공개 IP 주소만 있는 GCP 인스턴스가 네트워크의 방화벽 규칙에 따라 Google API 및 서비스의 공개 IP 주소에 액세스할 수 있습니다.
비공개 Google 액세스 및 VPC 서브넷
비공개 Google 액세스 기능은 Google 공개 API로 송신되는 트래픽이 확인되면 이를 가로채 Google 내부로 라우팅합니다. 비공개 Google 액세스 서브넷에 있는 VM과 Google API 간의 트래픽은 항상 Google 네트워크 내에서 유지됩니다.
그렇다. 자동 내부라우팅 기능일 뿐이었다.
오 그럼 db통신을 공개 API로 진행하면 내부라우팅으로 자동으로 전환해준다는것. 결국 실제 Private subnet의 사용은 아닌것이다.
이글은 스터디 이전에 작성되었고 스터디 이후 어느정도 생각이 정리되었다.
생각을 정리하기 위해서 테스트한 내용이다.
External IP 가 없는 인스턴스와 External IP 이 부여된 인스턴스 두가지를 생성하였다.
Internal IP만 존재하는 인스턴스는 외부와 통신할수 없다. 신기하게 console SSH로는 붙는다. AWS 의 구체화된 망구성과는 다르게 GCP의 망분리 구성은 구체적인 부분이 있지만 AWS와는 다른 개념이었다.
AWS의 망구성은 계층적이고 구체적인데 GCP의 망구성은 단순하다.
다른 표현이 딱히 있는거 같지 않다. External IP의 유무로 public / private 을 나눈다. 글로벌 인프라로 VPC를 생성하고 리전에 subnet이 종속된다. subnet 하단에 az가 나눠지게 된다. AWS의 역할별 subnet은 만들순 있으나 GCP에선 의미가 없는것이다.
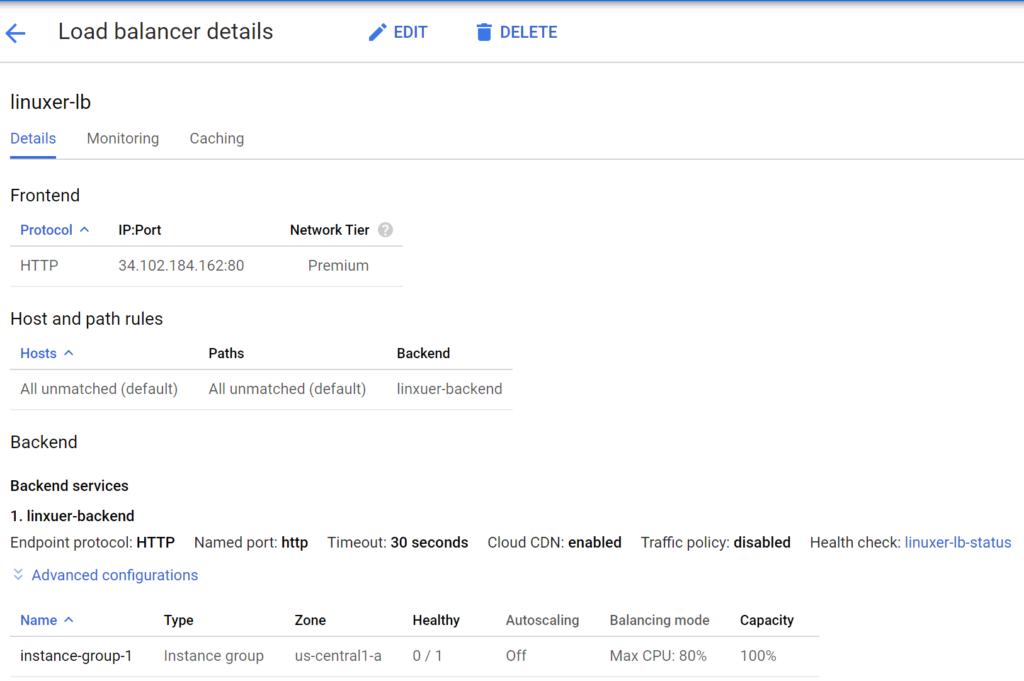
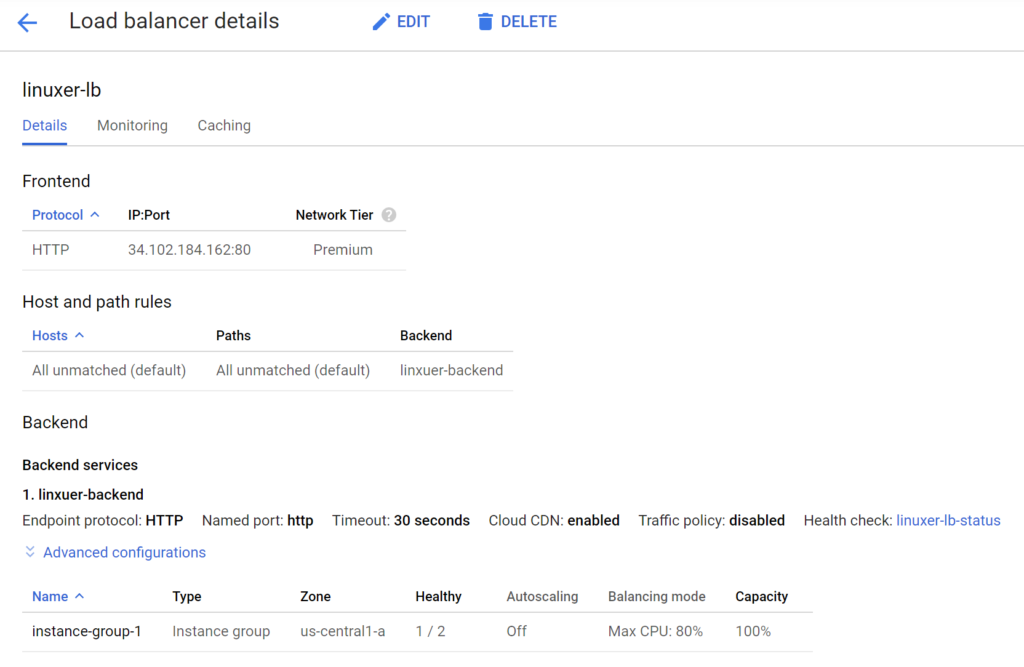
테스트를 위해서 Internal IP만 가진 인스턴스를 로드벨런서에 연결했다.
인스턴스는 instance-group1 에 묶여서 로드벨런서에 연결했다.
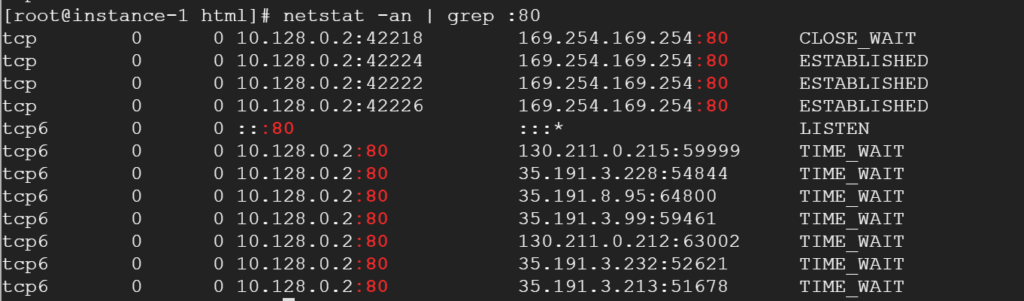
로드벨런서의 구성은 차차 언급하기로하고 NAT가 없는 상태의 인스턴스이지만 로드벨런서의 요청에는 착실히 응답하였다. 만족스럽다.
만족스러운 이유는 따로있다. GCP는 private 인스턴스 임에도 불구하고 ssh 접속으로 작업이 가능하고, 로드벨런서 또한 잘되니까 보안도 챙기는데 작업도 편한 그런느낌이다.
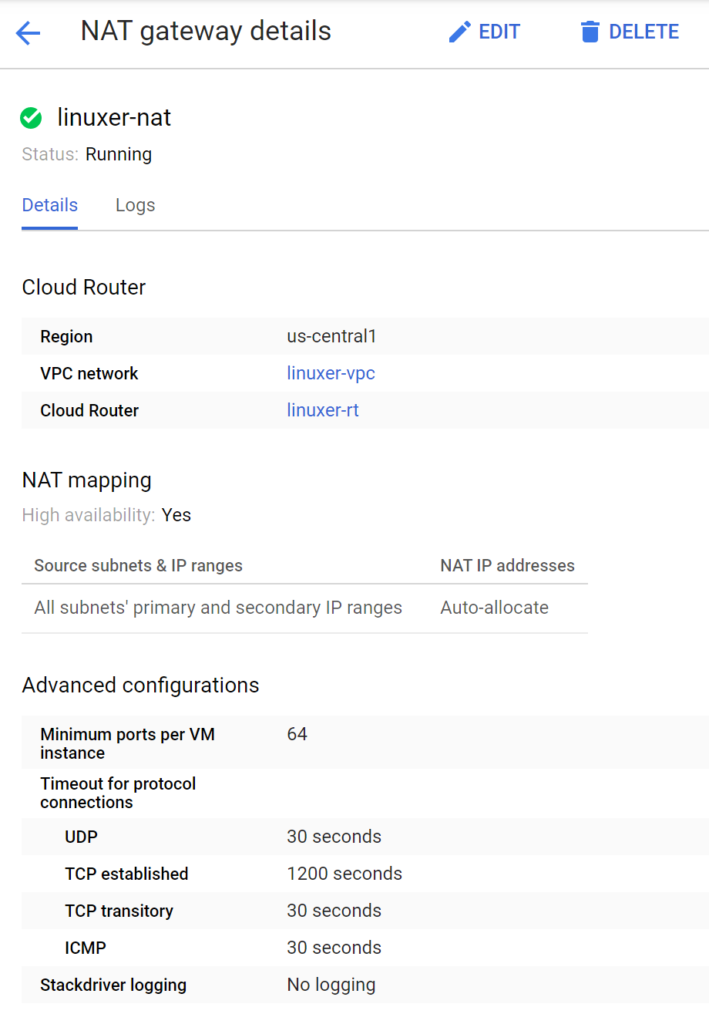
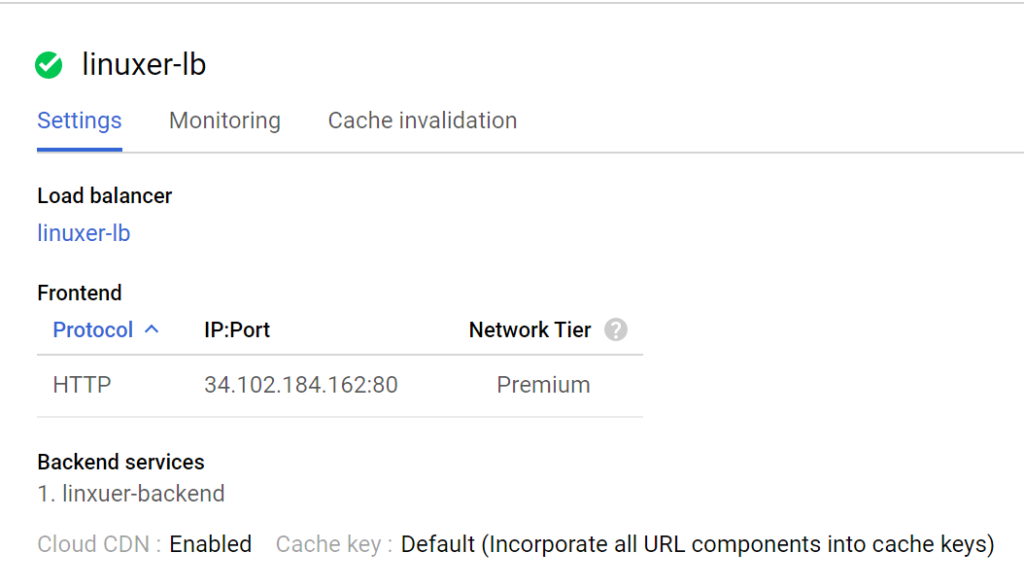
정상적인 네트워크의 테스트를 위해서 Cloud NAT 또한 넣어서 진행했다.
NAT 생성은 단순하다.
NAT name / VPC / Region / Nat route / IP 옵션만 지정해주면 바로 생성이된다.
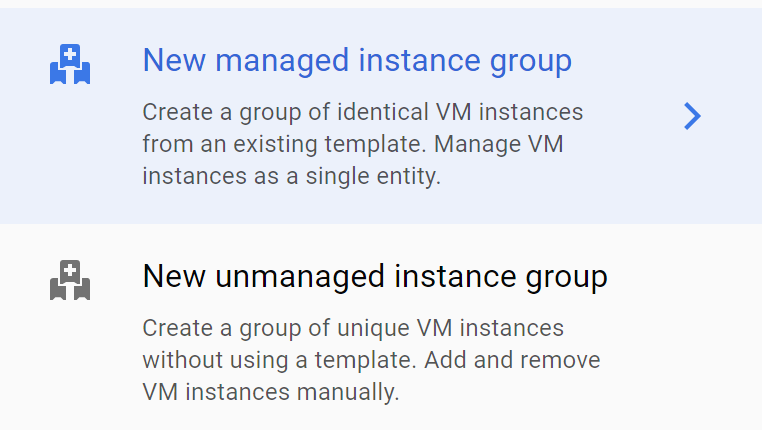
로드벨런서는 먼저 세가지로 분류가 되는데 선행되어야 하는 작업이 있다. 인스턴스 그룹을 생성해야한다. 인스턴스 그룹은 managed / unmanaged 로 나뉜다.