AWS

AWS Certified Machine Learning - Specialty - MLS-C01 - Review

오랜만의 자격증 글입니다.

최근에 책한권을 추천받았습니다.

기계학습을 다시묻다 라는 책이었습니다.
이광근 교수님의 번역에 대한 생각과 이해를 볼수있는 책이었습니다.

이 책을 읽으면서 너무너무너무너무 이해가 안갔습니다.
그 동안 머신러닝을 지속적으로 찍먹을 하던터라 읽을만 하지 않을까? 했는데 아니나 다를까 수포자에겐 자비가 없었습니다.

그렇지만, 근일년간 쿠버네티스와 머신러닝을 찍먹하면서 내가 머신러닝을 실무에 적용하고 쓸수있는 레벨은 아니지만 어떤기술이 어디서 사용된다 정도는 이해하고 있던터라 한번 과감하게 시험날자를 잡았습니다.

등급: Specialty
시간: 시험 완료까지 180분 소요
비용: 300 USD 

형식: 65개 문항, 다항 선택 또는 복수 응답
제공 방법: Pearson VUE 및 PSI. 테스트 센터 또는 온라인 유감독 시험

12월 24일 아침9 시 였습니다.

저의 시험의 시작은 보통 Jayendra 님의 블로그입니다.

https://explore.skillbuilder.aws/learn/course/external/view/elearning/27/exam-readiness-aws-certified-machine-learning-specialty

AWS에서 제공하는 연습시험 준비

https://docs.aws.amazon.com/ko_kr/sagemaker/latest/dg/algos.html

Sagemaker의 알고리즘표

기본적으로 AWS Docs/FAQ 찬찬히 여러번 읽는것부터 추천
저는 sagemaker의 핸즈온을 해본적이 있고, AWS에 익숙한 편이라 알고리즘 부분을 빼면 대부분 아주 수월하게 읽을 수 있었습니다.

jayendra 님의 정리된 내용이 너무 간결하고 좋아서 깊이있는 이해나 UI에서 어떤것들을 지원하는지 보면됩니다.

그리고 대망의 22일 연습시험을 봤습니다.

아아…그런건가 현대차.. - 주식 게시판 - 에펨코리아
 Jeong Taehwan님, 안녕하세요?
 AWS Certified Machine Learning - Specialty Practice 시험에 응시해 주셔서 감사합니다. 다음 정보를 살펴보고 준비가 더 필요한 주제를 확인하십시오.
총점: 55%
주제별 채점:
1.0  Data Engineering: 100%
2.0  Exploratory Data Analysis: 60%
3.0  Modeling: 25%
4.0  Machine Learning Implementation and Operations: 75%

아아..이것이 탈락의 느낌인가..

예..22일 연습시험이 55%로 너무 불안했습니다.

그리고 그 다음날은 약속도 있어서 예상한 만큼 공부를 할수있을지도 몰랐습니다.

그 약속의 감동

그 불안감이 점점 커져가며 저를 긴장하게 만들었고, 집중할수 없는 순간에도 알고리즘을 찾아보며, 내가 뭘모르는지를 이해하기 위해 힘썼습니다. 그리고 시험은 AWS 오프라인 시험을 봤습니다.

결과는!!

894점으로 합격할수 있었습니다.

AWS Certified Machine Learning - Specialty 배지

이로서 AWS의 10번째 자격증을 획득하였습니다.

읽어주셔서 감사합니다.

EKS-prometheus-grafana

https://docs.aws.amazon.com/ko_kr/eks/latest/userguide/prometheus.html

먼저 프로메테우스를 설치한다.

cat << EOF | k apply -f -
 ---
 apiVersion: v1
 kind: PersistentVolumeClaim
 metadata:
   name: grafana-pvc
 spec:
   accessModes:
     - ReadWriteOnce
   resources:
     requests:
       storage: 1Gi
 ---
 apiVersion: apps/v1
 kind: Deployment
 metadata:
   labels:
     app: grafana
   name: grafana
 spec:
   selector:
     matchLabels:
       app: grafana
   template:
     metadata:
       labels:
         app: grafana
     spec:
       securityContext:
         fsGroup: 472
         supplementalGroups:
           - 0
       containers:
         - name: grafana
           image: grafana/grafana:7.5.2
           imagePullPolicy: IfNotPresent
           ports:
             - containerPort: 3000
               name: http-grafana
               protocol: TCP
           readinessProbe:
             failureThreshold: 3
             httpGet:
               path: /robots.txt
               port: 3000
               scheme: HTTP
             initialDelaySeconds: 10
             periodSeconds: 30
             successThreshold: 1
             timeoutSeconds: 2
           livenessProbe:
             failureThreshold: 3
             initialDelaySeconds: 30
             periodSeconds: 10
             successThreshold: 1
             tcpSocket:
               port: 3000
             timeoutSeconds: 1
           resources:
             requests:
               cpu: 250m
               memory: 750Mi
           volumeMounts:
             - mountPath: /var/lib/grafana
               name: grafana-pv
       volumes:
         - name: grafana-pv
           persistentVolumeClaim:
             claimName: grafana-pvc
 ---
 apiVersion: v1
 kind: Service
 metadata:
   name: grafana
 spec:
   ports:
     - port: 3000
       protocol: TCP
       targetPort: http-grafana
   selector:
     app: grafana
   sessionAffinity: None
   type: LoadBalancer
 EOF

https://grafana.com/docs/grafana/latest/installation/kubernetes/

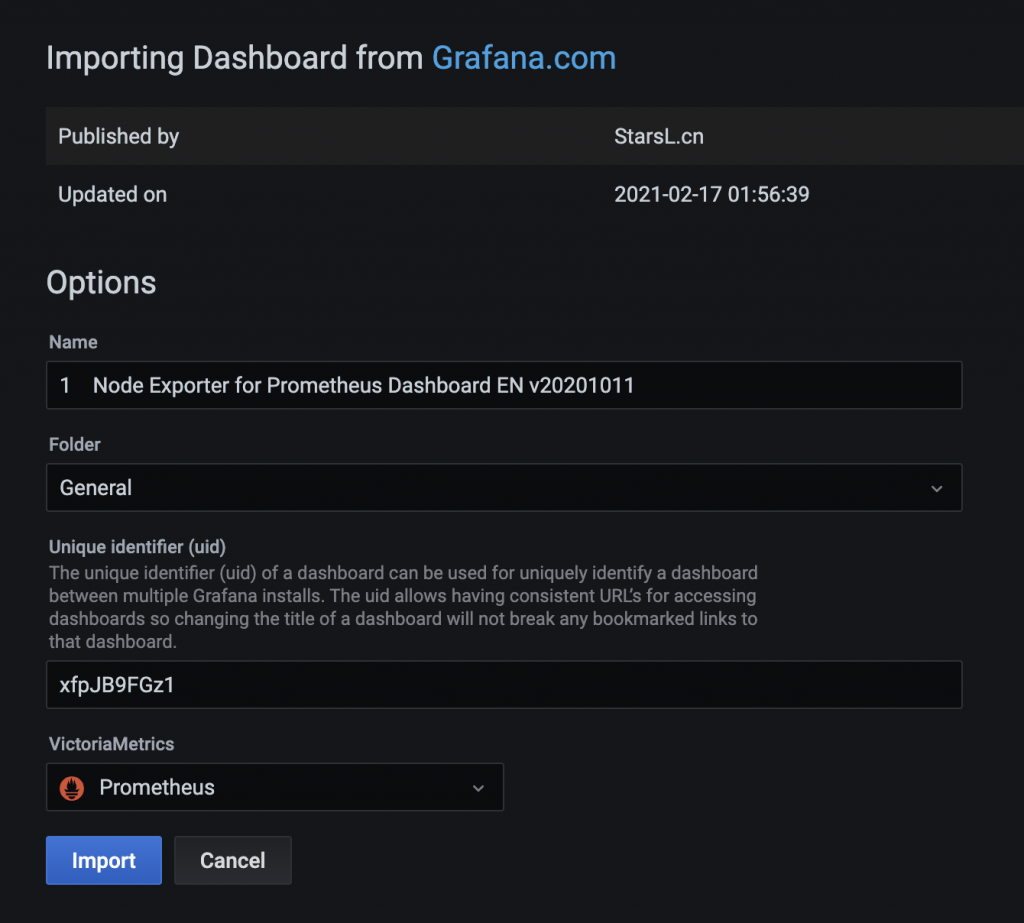
설치는 위링크를 참조하고 grafana svc type 만 LoadBalancer 로 변경한다.

k get svc
NAME         TYPE           CLUSTER-IP       EXTERNAL-IP                                                                   PORT(S)          AGE
grafana      LoadBalancer   172.20.237.228   af7fa7486f6eb4ad4a6bde897210f4a9-206885623.ap-northeast-2.elb.amazonaws.com   3000:32317/TCP   32m

그라파나의 서비스가 다만들어지면 URL로 접근이 가능하다.

패스워드는 admin / admin 이다.

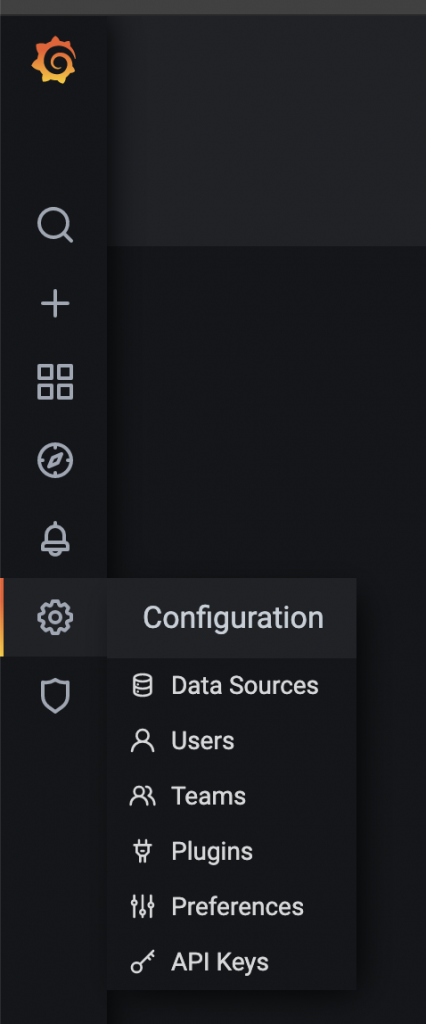
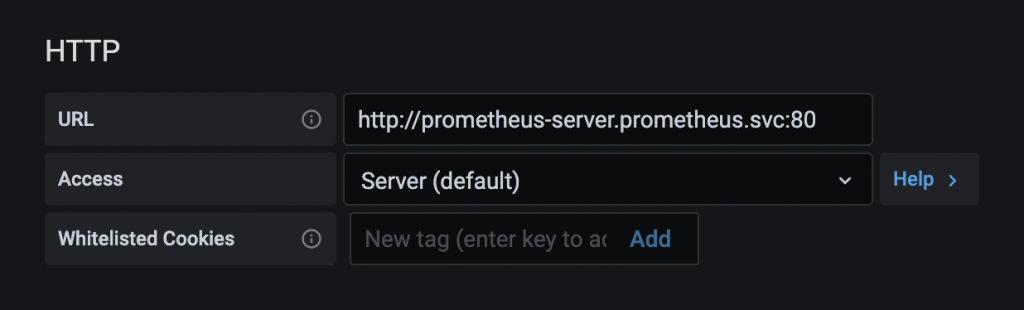
로그인후 할일은 data source 를 지정하는것이다. 우리는 prometheus 를 이용할것이다.

서비스이름/네임스페이스/svc:port 로 지정한다.

save & test 눌러서 잘되는지 확인하자.

그리고 dashboard를 import 하자.

https://grafana.com/grafana/dashboards/11074

많은 사람이 애용하는 dashboard를 사용할것이다. import 는 ID로 넣으면된다 이경우엔 11074 를 입력하자

VictoriaMetrics 를 프로메테우스로 지정하자. 그리고 Import 하면 대시보드가 뜬다.

대략 이런 대시보드가 자동으로 수집된다.

https://grafana.com/grafana/dashboards/13770

그라파나는 사람들이 만들어놓은 대시보드를 이용하기 쉽다.

그리고 node-exporter 로 만들어내는 매트릭리스트를 파악하여 원하는 지표를 사용할수 있다.

https://prometheus.io/docs/guides/node-exporter/

위URL을 참고해서 매트릭을 확인하여 보자.

예를 들어서 Dropped packet를 확인하려 한다면 다음 매트릭을 확인할수 있다.

읽어주셔서 감사하다!

올해의 가시다님 과의 스터디가 마무리되었다. 같이 EKS 스터디에 참여해주신분들께 감사를 드리며, 평안한 하루되시라!

AKOS-Study-Manual-EKS-istio

클러스터를 먼저 프로비저닝 했다. 30분이상이 걸리는 작업이므로 시작해놓고 기다린다.

eksctl create cluster --vpc-public-subnets $WKSubnets --name $CLUSTER_NAME --region $AWS_REGION --version 1.21 \
> --nodegroup-name $CLUSTER_NAME-nodegroup --node-type t3.medium --nodes 3 --nodes-min 3 --nodes-max 6 \
> --with-oidc --node-volume-size=20 --ssh-access --ssh-public-key $MySSHKeypair
2021-09-04 11:29:11 [ℹ]  eksctl version 0.63.0
2021-09-04 11:29:11 [ℹ]  using region ap-northeast-2
2021-09-04 11:29:12 [✔]  using existing VPC (vpc-094808933b68add7c) and subnets (private:map[] public:map[ap-northeast-2a:{subnet-0a603a222db0cce10 ap-northeast-2a 10.0.11.0/24} ap-northeast-2b:{subnet-007964ce4a003361a ap-northeast-2b 10.0.12.0/24} ap-northeast-2c:{subnet-007813cf58631ef3b ap-northeast-2c 10.0.13.0/24}])
2021-09-04 11:29:12 [!]  custom VPC/subnets will be used; if resulting cluster doesn't function as expected, make sure to review the configuration of VPC/subnets
2021-09-04 11:29:12 [ℹ]  nodegroup "first-eks-nodegroup" will use "" [AmazonLinux2/1.21]
2021-09-04 11:29:12 [ℹ]  using EC2 key pair %!q(*string=<nil>)
2021-09-04 11:29:12 [ℹ]  using Kubernetes version 1.21
2021-09-04 11:29:12 [ℹ]  creating EKS cluster "first-eks" in "ap-northeast-2" region with managed nodes
2021-09-04 11:29:12 [ℹ]  will create 2 separate CloudFormation stacks for cluster itself and the initial managed nodegroup
2021-09-04 11:29:12 [ℹ]  if you encounter any issues, check CloudFormation console or try 'eksctl utils describe-stacks --region=ap-northeast-2 --cluster=first-eks'
2021-09-04 11:29:12 [ℹ]  CloudWatch logging will not be enabled for cluster "first-eks" in "ap-northeast-2"
2021-09-04 11:29:12 [ℹ]  you can enable it with 'eksctl utils update-cluster-logging --enable-types={SPECIFY-YOUR-LOG-TYPES-HERE (e.g. all)} --region=ap-northeast-2 --cluster=first-eks'
2021-09-04 11:29:12 [ℹ]  Kubernetes API endpoint access will use default of {publicAccess=true, privateAccess=false} for cluster "first-eks" in "ap-northeast-2"
2021-09-04 11:29:12 [ℹ]  2 sequential tasks: { create cluster control plane "first-eks", 3 sequential sub-tasks: { 4 sequential sub-tasks: { wait for control plane to become ready, associate IAM OIDC provider, 2 sequential sub-tasks: { create IAM role for serviceaccount "kube-system/aws-node", create serviceaccount "kube-system/aws-node" }, restart daemonset "kube-system/aws-node" }, 1 task: { create addons }, create managed nodegroup "first-eks-nodegroup" } }
2021-09-04 11:29:12 [ℹ]  building cluster stack "eksctl-first-eks-cluster"
2021-09-04 11:29:12 [ℹ]  deploying stack "eksctl-first-eks-cluster"
2021-09-04 11:29:42 [ℹ]  waiting for CloudFormation stack "eksctl-first-eks-cluster"
2021-09-04 11:30:12 [ℹ]  waiting for CloudFormation stack "eksctl-first-eks-cluster"
2021-09-04 11:31:12 [ℹ]  waiting for CloudFormation stack "eksctl-first-eks-cluster"
2021-09-04 11:32:12 [ℹ]  waiting for CloudFormation stack "eksctl-first-eks-cluster"
2021-09-04 11:33:12 [ℹ]  waiting for CloudFormation stack "eksctl-first-eks-cluster"
2021-09-04 11:34:12 [ℹ]  waiting for CloudFormation stack "eksctl-first-eks-cluster"
2021-09-04 11:35:12 [ℹ]  waiting for CloudFormation stack "eksctl-first-eks-cluster"
2021-09-04 11:36:12 [ℹ]  waiting for CloudFormation stack "eksctl-first-eks-cluster"
2021-09-04 11:37:12 [ℹ]  waiting for CloudFormation stack "eksctl-first-eks-cluster"
2021-09-04 11:38:12 [ℹ]  waiting for CloudFormation stack "eksctl-first-eks-cluster"
2021-09-04 11:39:12 [ℹ]  waiting for CloudFormation stack "eksctl-first-eks-cluster"
2021-09-04 11:40:13 [ℹ]  waiting for CloudFormation stack "eksctl-first-eks-cluster"
2021-09-04 11:41:13 [ℹ]  waiting for CloudFormation stack "eksctl-first-eks-cluster"
2021-09-04 11:45:14 [ℹ]  building iamserviceaccount stack "eksctl-first-eks-addon-iamserviceaccount-kube-system-aws-node"
2021-09-04 11:45:14 [ℹ]  deploying stack "eksctl-first-eks-addon-iamserviceaccount-kube-system-aws-node"

EKS를 Setup 하는 과정에 대해선 이전포스팅을 참고하기 바란다.

간단한 실습이 있지만..음 istio는 못참지.

가즈아!

먼저 istioctl을 설치하자.

curl -L https://istio.io/downloadIstio | ISTIO_VERSION=1.10.4 TARGET_ARCH=x86_64 sh -
tree istio-1.10.4/ -L 2
mv istio-1.10.4/bin/istioctl /usr/local/bin/istioctl
istioctl version

버전과 상황에 따라 설치 방법이 다를 수 있다.

istioctl install --set profile=demo -y

demo로 프로파일을 설정하게되면 istio에서 사용하는 모든 오브젝트를 설치해준다. 그러므로 만약 프로덕션에서 사용한다면 원하는 오브젝트만 따로 설치하자.

nginx pod에 istio inject 명령어로 yaml 에 istio를 주입하면 이렇게 된다.

#전
apiVersion: v1
kind: Pod
metadata:
  name: pod1
spec:
  containers:
  - name: nginx
    image: nginx
    ports:
    - containerPort: 80
#후    
istioctl kube-inject -f pod1.yaml
apiVersion: v1
kind: Pod
metadata:
  annotations:
    kubectl.kubernetes.io/default-container: nginx
    kubectl.kubernetes.io/default-logs-container: nginx
    prometheus.io/path: /stats/prometheus
    prometheus.io/port: "15020"
    prometheus.io/scrape: "true"
    sidecar.istio.io/status: '{"initContainers":["istio-init"],"containers":["istio-proxy"],"volumes":["istio-envoy","istio-data","istio-podinfo","istio-token","istiod-ca-cert"],"imagePullSecrets":null}'
  creationTimestamp: null
  labels:
    istio.io/rev: default
    security.istio.io/tlsMode: istio
    service.istio.io/canonical-name: pod1
    service.istio.io/canonical-revision: latest
  name: pod1
spec:
  containers:
  - image: nginx
    name: nginx
    ports:
    - containerPort: 80
    resources: {}
  - args:
    - proxy
    - sidecar
    - --domain
    - $(POD_NAMESPACE).svc.cluster.local
    - --serviceCluster
    - pod1.default
    - --proxyLogLevel=warning
    - --proxyComponentLogLevel=misc:error
    - --log_output_level=default:info
    - --concurrency
    - "2"
    env:
    - name: JWT_POLICY
      value: third-party-jwt
    - name: PILOT_CERT_PROVIDER
      value: istiod
    - name: CA_ADDR
      value: istiod.istio-system.svc:15012
    - name: POD_NAME
      valueFrom:
        fieldRef:
          fieldPath: metadata.name
    - name: POD_NAMESPACE
      valueFrom:
        fieldRef:
          fieldPath: metadata.namespace
    - name: INSTANCE_IP
      valueFrom:
        fieldRef:
          fieldPath: status.podIP
    - name: SERVICE_ACCOUNT
      valueFrom:
        fieldRef:
          fieldPath: spec.serviceAccountName
    - name: HOST_IP
      valueFrom:
        fieldRef:
          fieldPath: status.hostIP
    - name: CANONICAL_SERVICE
      valueFrom:
        fieldRef:
          fieldPath: metadata.labels['service.istio.io/canonical-name']
    - name: CANONICAL_REVISION
      valueFrom:
        fieldRef:
          fieldPath: metadata.labels['service.istio.io/canonical-revision']
    - name: PROXY_CONFIG
      value: |
        {}
    - name: ISTIO_META_POD_PORTS
      value: |-
        [
            {"containerPort":80}
        ]
    - name: ISTIO_META_APP_CONTAINERS
      value: nginx
    - name: ISTIO_META_CLUSTER_ID
      value: Kubernetes
    - name: ISTIO_META_INTERCEPTION_MODE
      value: REDIRECT
    - name: ISTIO_META_WORKLOAD_NAME
      value: pod1
    - name: ISTIO_META_OWNER
      value: kubernetes://apis/v1/namespaces/default/pods/pod1
    - name: ISTIO_META_MESH_ID
      value: cluster.local
    - name: TRUST_DOMAIN
      value: cluster.local
    image: docker.io/istio/proxyv2:1.10.4
    name: istio-proxy
    ports:
    - containerPort: 15090
      name: http-envoy-prom
      protocol: TCP
    readinessProbe:
      failureThreshold: 30
      httpGet:
        path: /healthz/ready
        port: 15021
      initialDelaySeconds: 1
      periodSeconds: 2
      timeoutSeconds: 3
    resources:
      limits:
        cpu: "2"
        memory: 1Gi
      requests:
        cpu: 10m
        memory: 40Mi
    securityContext:
      allowPrivilegeEscalation: false
      capabilities:
        drop:
        - ALL
      privileged: false
      readOnlyRootFilesystem: true
      runAsGroup: 1337
      runAsNonRoot: true
      runAsUser: 1337
    volumeMounts:
    - mountPath: /var/run/secrets/istio
      name: istiod-ca-cert
    - mountPath: /var/lib/istio/data
      name: istio-data
    - mountPath: /etc/istio/proxy
      name: istio-envoy
    - mountPath: /var/run/secrets/tokens
      name: istio-token
    - mountPath: /etc/istio/pod
      name: istio-podinfo
  initContainers:
  - args:
    - istio-iptables
    - -p
    - "15001"
    - -z
    - "15006"
    - -u
    - "1337"
    - -m
    - REDIRECT
    - -i
    - '*'
    - -x
    - ""
    - -b
    - '*'
    - -d
    - 15090,15021,15020
    image: docker.io/istio/proxyv2:1.10.4
    name: istio-init
    resources:
      limits:
        cpu: "2"
        memory: 1Gi
      requests:
        cpu: 10m
        memory: 40Mi
    securityContext:
      allowPrivilegeEscalation: false
      capabilities:
        add:
        - NET_ADMIN
        - NET_RAW
        drop:
        - ALL
      privileged: false
      readOnlyRootFilesystem: false
      runAsGroup: 0
      runAsNonRoot: false
      runAsUser: 0
  volumes:
  - emptyDir:
      medium: Memory
    name: istio-envoy
  - emptyDir: {}
    name: istio-data
  - downwardAPI:
      items:
      - fieldRef:
          fieldPath: metadata.labels
        path: labels
      - fieldRef:
          fieldPath: metadata.annotations
        path: annotations
      - path: cpu-limit
        resourceFieldRef:
          containerName: istio-proxy
          divisor: 1m
          resource: limits.cpu
      - path: cpu-request
        resourceFieldRef:
          containerName: istio-proxy
          divisor: 1m
          resource: requests.cpu
    name: istio-podinfo
  - name: istio-token
    projected:
      sources:
      - serviceAccountToken:
          audience: istio-ca
          expirationSeconds: 43200
          path: istio-token
  - configMap:
      name: istio-ca-root-cert
    name: istiod-ca-cert
status: {}
---

istio의 sidecar가 nginx pod에 삽입되게 된다.

      limits:
        cpu: "2"
        memory: 1Gi
      requests:
        cpu: 10m
        memory: 40Mi

사용하는 자원의 제한은 위와같다. istio-init(initcontainer) proxy(envoy) 가 추가된다.

kubectl label namespace default istio-injection=enabled
namespace/default labeled
kubectl get ns -L istio-injection
NAME              STATUS   AGE   ISTIO-INJECTION
default           Active   46m   enabled

namespace 에 라벨을 붙이면 자동으로 그뒤론 NS 에 sidecar가 붙게된다.

k run nginx-istio --image=nginx --restart=Never
pod/nginx-istio created
k get pod
NAME          READY   STATUS            RESTARTS   AGE
nginx-istio   0/2     PodInitializing   0          4s
pod1          2/2     Running           0          5m11s

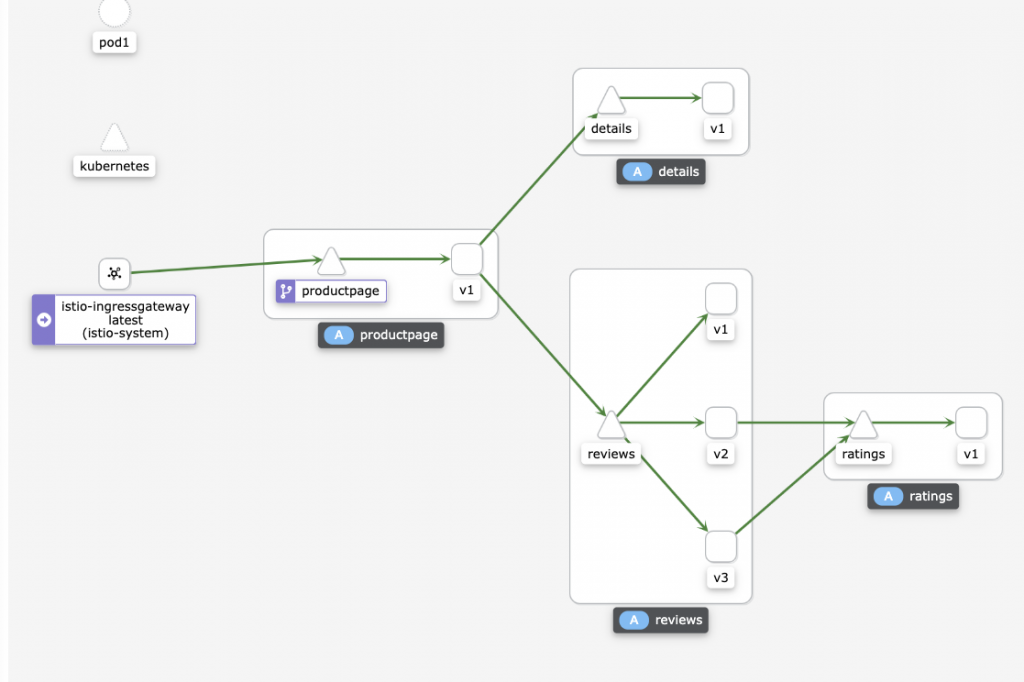
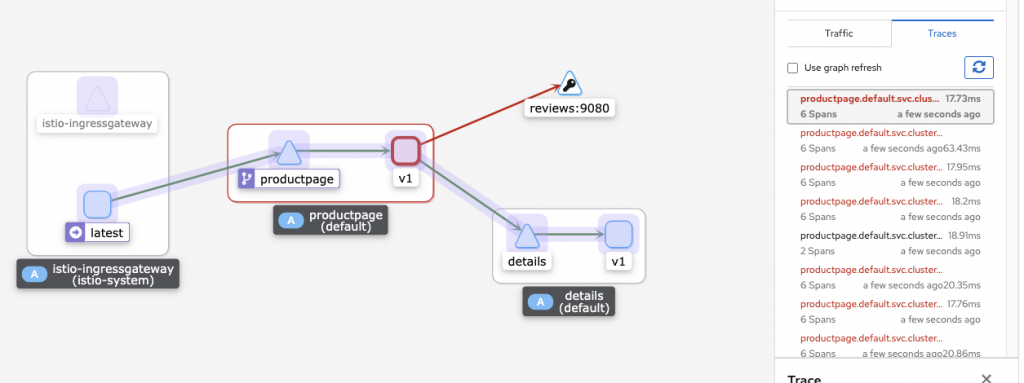
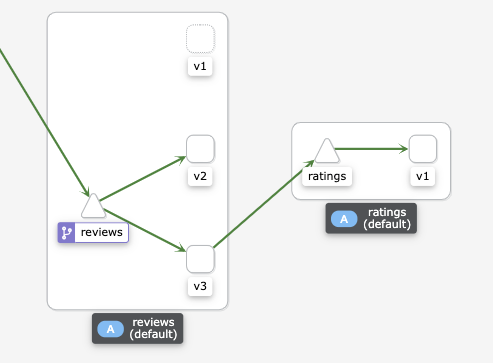
이제 sidecar를 본격적으로 확인해보자.

kubectl apply -f istio-1.10.4/samples/addons

아까 다운로드한 istio 에서 샘플로제공된 애드온을 설치한다. 위와같은 명령어를 치면 모든 애드온이 설치된다. 애드온내부에 있는 특정 애드온만도 설치가능하니 필요하면 특정 애드온만 설치해도 된다.

kiali.yaml 를 설치할때 kind 에 MonitoringDashboard 가 있어야 설치가 되는데 처음에 한꺼번에 다 배포를 하면 실패한다 그럼 그냥 쿨하게 명령어 한번더 입력해주자.

이제 애드온으로 접근하기위해선 애드온의 서비스를 퍼블릭하게 변경해줘야하는데, 나는 이전에는 yaml를 손수 수정했는데 이부분이 싱크빅하다.

k get svc -n istio-system grafana -o yaml | sed -e "s/type: ClusterIP/type: LoadBalancer/" | kubectl apply -f -
service/grafana configured
k get svc -n istio-system kiali -o yaml | sed -e "s/type: ClusterIP/type: LoadBalancer/" | kubectl apply -f -
service/kiali configured
k get svc -n istio-system tracing -o yaml | sed -e "s/type: ClusterIP/type: LoadBalancer/" | kubectl apply -f -
service/tracing configured

sed 로 수정해서 바로 적용한다. 와우..당연히 내가 못하는건 아닌데 관념의 차이로 인하여 이런 사용을 생각못했다. 다음엔 써먹어야지

ubectl get svc -n istio-system
NAME                   TYPE           CLUSTER-IP      EXTERNAL-IP                                                                    PORT(S)                                                AGE
grafana                LoadBalancer   172.20.162.75   a6d32baedc66b4633bb7fbb0875c6132-465014933.ap-northeast-2.elb.amazonaws.com    3000:30572/TCP                                                3m51s
istio-egressgateway    ClusterIP      172.20.129.21   <none>                                                                         80/TCP,443/TCP                                                21m
istio-ingressgateway   LoadBalancer   172.20.95.93    a0e6177dd9cb64884bd2893028c04328-781274984.ap-northeast-2.elb.amazonaws.com    15021:31227/TCP,80:30590/TCP,443:32395/TCP,31400:32264/TCP,15443:32750/TCP   21m
istiod                 ClusterIP      172.20.90.49    <none>                                                                         15010/TCP,15012/TCP,443/TCP,15014/TCP                                        21m
jaeger-collector       ClusterIP      172.20.99.248   <none>                                                                         14268/TCP,14250/TCP                                                3m51s
kiali                  LoadBalancer   172.20.96.205   a313dbdb158064d578d88c0a022bc845-1007771282.ap-northeast-2.elb.amazonaws.com   20001:30296/TCP,9090:30713/TCP                                               3m51s
prometheus             ClusterIP      172.20.50.6     <none>                                                                         9090/TCP                                                3m50s
tracing                LoadBalancer   172.20.58.118   a9da5b64099ed4fd3b5abdf3b1cd9ebe-68617878.ap-northeast-2.elb.amazonaws.com     80:30295/TCP                                                3m51s
zipkin                 ClusterIP      172.20.76.230   <none>                                                                         9411/TCP                                                3m51s

샘플 manifest 중에 bookinfo 가 있다.

샘플에서 보여주는것은 트래픽이 어떻게 흐르는지 시각화로 보여주는것이다.

문제가 생길경우 다음과같이 UI 와 로깅으로 확인이 가능하다.

apiVersion: networking.istio.io/v1alpha3
kind: VirtualService
metadata:
  name: reviews
spec:
  hosts:
    - reviews
  http:
  - route:
    - destination:
        host: reviews
        subset: v2
      weight: 50
    - destination:
        host: reviews
        subset: v3
      weight: 50

위의 에러는 기본적인 destination rule 을 설정하지 않은 상태로 review 에 대한 룰을 설정해서 그렇다.

apiVersion: networking.istio.io/v1alpha3
kind: DestinationRule
metadata:
  name: productpage
spec:
  host: productpage
  subsets:
  - name: v1
    labels:
      version: v1
---
apiVersion: networking.istio.io/v1alpha3
kind: DestinationRule
metadata:
  name: reviews
spec:
  host: reviews
  subsets:
  - name: v1
    labels:
      version: v1
  - name: v2
    labels:
      version: v2
  - name: v3
    labels:
      version: v3
---
apiVersion: networking.istio.io/v1alpha3
kind: DestinationRule
metadata:
  name: ratings
spec:
  host: ratings
  subsets:
  - name: v1
    labels:
      version: v1
  - name: v2
    labels:
      version: v2
  - name: v2-mysql
    labels:
      version: v2-mysql
  - name: v2-mysql-vm
    labels:
      version: v2-mysql-vm
---
apiVersion: networking.istio.io/v1alpha3
kind: DestinationRule
metadata:
  name: details
spec:
  host: details
  subsets:
  - name: v1
    labels:
      version: v1
  - name: v2
    labels:
      version: v2
---

destination rule 을 설정하고 보면 reviews rule 이 정상적으로 작동하는것을 알수있다.

적용전
적용후

가중치에 의하여 v2/v3로만 라우팅 되는것을 확인할수 있다.

istio는 조만간 블로그에 적용후에 더 자세히 다뤄보도록 하겠다.

좋은 주말되시라!

AKOS-Study-Manual-EKS-Setup

두번째로 진행한 가시다님과의 스터디! AKOS다.

가시다님은 편한 스터디를 위해서 항상 CloudFromation 을 제공해주시지만 청개구리인 나는 사실 그대로 따라해본적은 없다. 이번에도 그렇다. 먼저 VPC와 bastion-hsot를 생성하는 cloudformation 템플릿을 주셨지만 어찌..엔지니어가 된자의 도리로 그대로 따라만 하겠는가..

라고 생각하여 일단 새로 생성하는것이 아닌..내가 사용하던 EC2에 셋팅을 했다.

미리 사용하던 VPC가 있었기에 VPC도 그대로 쓴다.

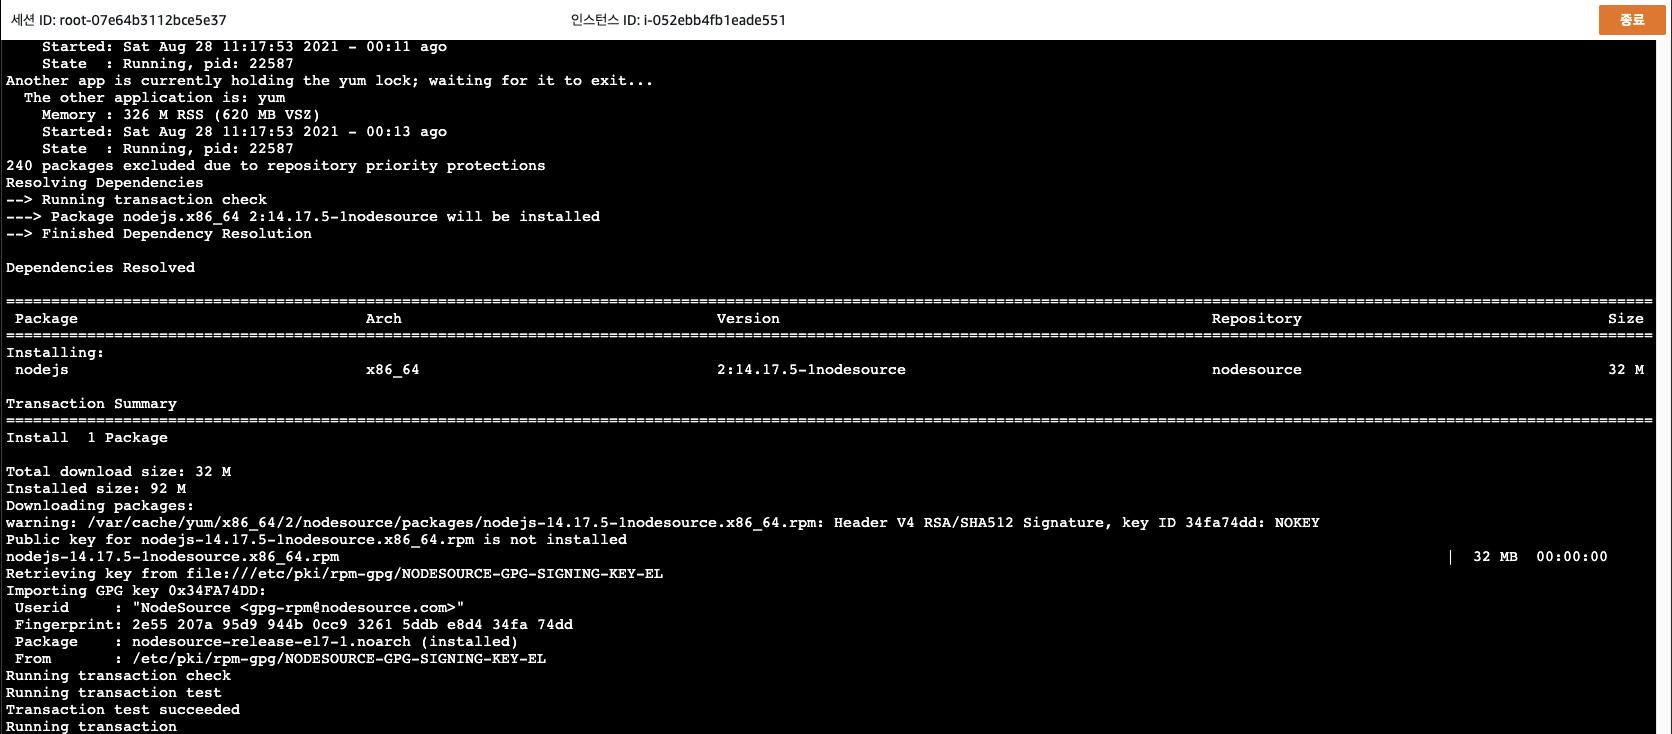
aws cli,eksctl,kubectl,
실습에서 사용하는 postgresql cmd docker 등 실습에 필요한 것들을 설치했다.
해당 부분은 cloudformation 템플릿에 user-data 로 셋팅하는 부분을 참고했다.

bastion-host를 셋팅후 bastion-host에 이미 ssm 을 사용하기 위해 추가했던 역할에 실습에 사용하기위한 권한을 을 부여했다.

실습이 끝나면 administratoraccess 권한을 제거한다.

EC2에 부여된 역할도 확인했다.

나는 SSM을 사용하기 때문에 SSH로 인스턴스를 접근하지 않는다. 실습중에 SSH에 접근하기 위해 보안그룹을 여는과정이 있었는데, 그부분은 스킵한다.

이런식으로 웹에서 콘솔을 사용할수 있다. SSH 와는 다르다 SSH와는..

자쿠와는 다르다! 자쿠와는!"은 무슨 뜻일까?

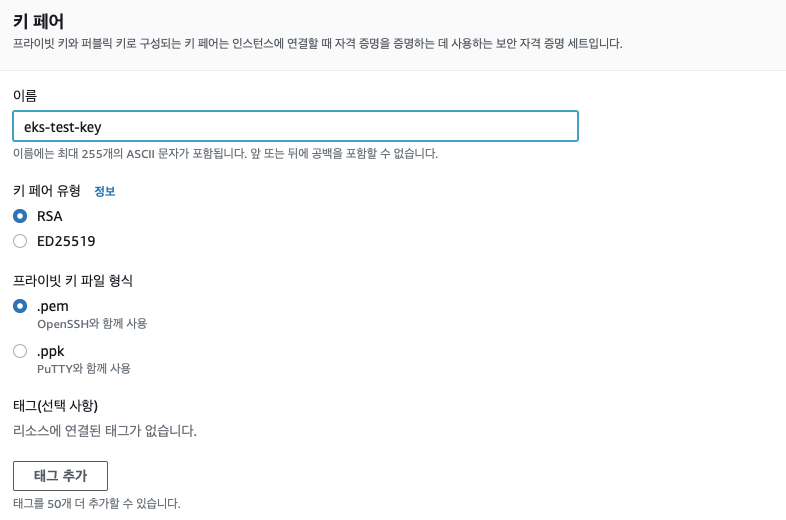
키페어를 생성하는 중에 추가된게 보였다 pem 말고 이젠 ppk 방식의 키도 제공한다..
이전까지는 puttygen으로 제너레이터 하던부분이 개선된거 같다. 개꿀팁...와...

이제 EKS 구성!!

클러스터 구성은 다음과 같은 명령어를 사용한다.

eksctl create cluster --vpc-public-subnets $WKSubnets --name $CLUSTER_NAME --region $AWS_REGION --version 1.21 \
 --nodegroup-name $CLUSTER_NAME-nodegroup --node-type t3.medium --nodes 3 --nodes-min 3 --nodes-max 6 \
 --with-oidc --node-volume-size=20 --ssh-access --ssh-public-key $MySSHKeypair --dry-run

근데 또 이대로 생성은 못한다. 이유는 나는..수동으로 하기때문.......가자 매뉴얼의 길!!

echo "export WKVPC=`aws ec2 describe-vpcs --filters Name=tag:Name,Values=Linuxer-Blog-VPC | jq -r '.Vpcs[].VpcId'`" >> ~/.bashrc
echo $WKVPC
vpc-094808933b68add7c
echo "export AWS_REGION=$AWS_REGION" >> ~/.bashrc
echo "export CLUSTER_NAME=first-eks" >> ~/.bashrc
echo "export WKSubnets=subnet-0a603a222db0cce10,subnet-007964ce4a003361a,subnet-007813cf58631ef3b" >> ~/.bashrc
echo "export MySSHKeypair=eks-test-key" >> ~/.bashrc
source ~/.bashrc

그리고 클러스터 생성을 dry-run 으로 하면

ksctl create cluster --vpc-public-subnets $WKSubnets --name $CLUSTER_NAME --region $AWS_REGION --version 1.21 \
>  --nodegroup-name $CLUSTER_NAME-nodegroup --node-type t3.medium --nodes 3 --nodes-min 3 --nodes-max 6 \
>  --with-oidc --node-volume-size=20 --ssh-access --ssh-public-key $MySSHKeypair --dry-run
apiVersion: eksctl.io/v1alpha5
availabilityZones:
- ap-northeast-2c
- ap-northeast-2b
- ap-northeast-2a
cloudWatch:
  clusterLogging: {}
iam:
  vpcResourceControllerPolicy: true
  withOIDC: true
kind: ClusterConfig
managedNodeGroups:
- amiFamily: AmazonLinux2
  desiredCapacity: 3
  disableIMDSv1: false
  disablePodIMDS: false
  iam:
    withAddonPolicies:
      albIngress: false
      appMesh: false
      appMeshPreview: false
      autoScaler: false
      certManager: false
      cloudWatch: false
      ebs: false
      efs: false
      externalDNS: false
      fsx: false
      imageBuilder: false
      xRay: false
  instanceSelector: {}
  instanceType: t3.medium
  labels:
    alpha.eksctl.io/cluster-name: first-eks
    alpha.eksctl.io/nodegroup-name: first-eks-nodegroup
  maxSize: 6
  minSize: 3
  name: first-eks-nodegroup
  privateNetworking: false
  releaseVersion: ""
  securityGroups:
    withLocal: null
    withShared: null
  ssh:
    allow: true
    publicKeyPath: eks-test-key
  tags:
    alpha.eksctl.io/nodegroup-name: first-eks-nodegroup
    alpha.eksctl.io/nodegroup-type: managed
  volumeIOPS: 3000
  volumeSize: 20
  volumeThroughput: 125
  volumeType: gp3
metadata:
  name: first-eks
  region: ap-northeast-2
  version: "1.21"
privateCluster:
  enabled: false
vpc:
  autoAllocateIPv6: false
  cidr: 10.0.0.0/16
  clusterEndpoints:
    privateAccess: false
    publicAccess: true
  id: vpc-094808933b68add7c
  manageSharedNodeSecurityGroupRules: true
  nat:
    gateway: Disable
  subnets:
    public:
      ap-northeast-2a:
        az: ap-northeast-2a
        cidr: 10.0.11.0/24
        id: subnet-0a603a222db0cce10
      ap-northeast-2b:
        az: ap-northeast-2b
        cidr: 10.0.12.0/24
        id: subnet-007964ce4a003361a
      ap-northeast-2c:
        az: ap-northeast-2c
        cidr: 10.0.13.0/24
        id: subnet-007813cf58631ef3b

잘 동작한다.

eksctl create cluster --vpc-public-subnets $WKSubnets --name $CLUSTER_NAME --region $AWS_REGION --version 1.21 \
>  --nodegroup-name $CLUSTER_NAME-nodegroup --node-type t3.medium --nodes 3 --nodes-min 3 --nodes-max 6 \
>  --with-oidc --node-volume-size=20 --ssh-access --ssh-public-key $MySSHKeypair
2021-08-28 12:09:47 [ℹ]  eksctl version 0.63.0
2021-08-28 12:09:47 [ℹ]  using region ap-northeast-2
2021-08-28 12:09:47 [✔]  using existing VPC (vpc-094808933b68add7c) and subnets (private:map[] public:map[ap-northeast-2a:{subnet-0a603a222db0cce10 ap-northeast-2a 10.0.11.0/24} ap-northeast-2b:{subnet-007964ce4a003361a ap-northeast-2b 10.0.12.0/24} ap-northeast-2c:{subnet-007813cf58631ef3b ap-northeast-2c 10.0.13.0/24}])
2021-08-28 12:09:47 [!]  custom VPC/subnets will be used; if resulting cluster doesn't function as expected, make sure to review the configuration of VPC/subnets
2021-08-28 12:09:47 [ℹ]  nodegroup "first-eks-nodegroup" will use "" [AmazonLinux2/1.21]
2021-08-28 12:09:47 [ℹ]  using EC2 key pair %!q(*string=<nil>)
2021-08-28 12:09:47 [ℹ]  using Kubernetes version 1.21
2021-08-28 12:09:47 [ℹ]  creating EKS cluster "first-eks" in "ap-northeast-2" region with managed nodes
2021-08-28 12:09:47 [ℹ]  will create 2 separate CloudFormation stacks for cluster itself and the initial managed nodegroup
2021-08-28 12:09:47 [ℹ]  if you encounter any issues, check CloudFormation console or try 'eksctl utils describe-stacks --region=ap-northeast-2 --cluster=first-eks'
2021-08-28 12:09:47 [ℹ]  CloudWatch logging will not be enabled for cluster "first-eks" in "ap-northeast-2"
2021-08-28 12:09:47 [ℹ]  you can enable it with 'eksctl utils update-cluster-logging --enable-types={SPECIFY-YOUR-LOG-TYPES-HERE (e.g. all)} --region=ap-northeast-2 --cluster=first-eks'
2021-08-28 12:09:47 [ℹ]  Kubernetes API endpoint access will use default of {publicAccess=true, privateAccess=false} for cluster "first-eks" in "ap-northeast-2"
2021-08-28 12:09:47 [ℹ]  2 sequential tasks: { create cluster control plane "first-eks", 3 sequential sub-tasks: { 4 sequential sub-tasks: { wait for control plane to become ready, associate IAM OIDC provider, 2 sequential sub-tasks: { create IAM role for serviceaccount "kube-system/aws-node", create serviceaccount "kube-system/aws-node" }, restart daemonset "kube-system/aws-node" }, 1 task: { create addons }, create managed nodegroup "first-eks-nodegroup" } }
2021-08-28 12:09:47 [ℹ]  building cluster stack "eksctl-first-eks-cluster"
2021-08-28 12:09:48 [ℹ]  deploying stack "eksctl-first-eks-cluster"
2021-08-28 12:10:18 [ℹ]  waiting for CloudFormation stack "eksctl-first-eks-cluster"

eksctl 도 내부적으론 cloudformation 으로 동작하는것을 알수있다.
eksctl 을 안쓰고 수동으로 node 만들고 EKS-master 에 연결하고 했다면 아마 좀힘들지 않았을까..? 하고 생각하는 중에 에러가 발생했다.

021-08-28 12:30:36 [✖]  unexpected status "ROLLBACK_IN_PROGRESS" while waiting for CloudFormation stack "eksctl-first-eks-nodegroup-first-eks-nodegroup"
2021-08-28 12:30:36 [ℹ]  fetching stack events in attempt to troubleshoot the root cause of the failure
2021-08-28 12:30:36 [!]  AWS::IAM::Role/NodeInstanceRole: DELETE_IN_PROGRESS
2021-08-28 12:30:36 [!]  AWS::EC2::LaunchTemplate/LaunchTemplate: DELETE_IN_PROGRESS
2021-08-28 12:30:36 [!]  AWS::EKS::Nodegroup/ManagedNodeGroup: DELETE_IN_PROGRESS
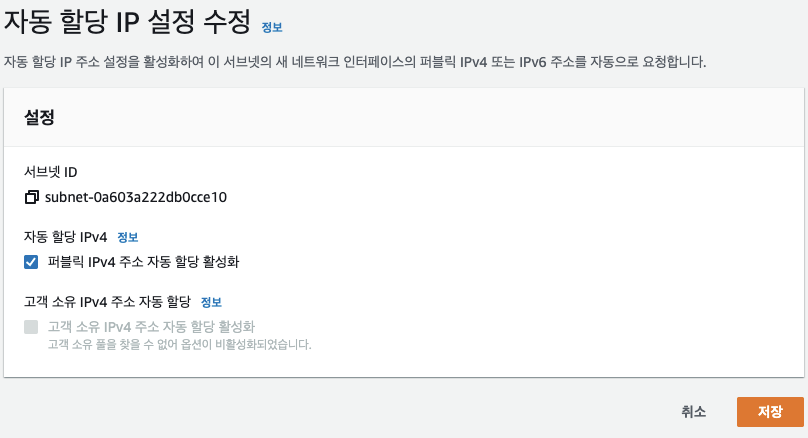
2021-08-28 12:30:36 [✖]  AWS::EKS::Nodegroup/ManagedNodeGroup: CREATE_FAILED – "Nodegroup first-eks-nodegroup failed to stabilize: [{Code: Ec2SubnetInvalidConfiguration,Message: One or more Amazon EC2 Subnets of [subnet-007964ce4a003361a, subnet-0a603a222db0cce10, subnet-007813cf58631ef3b] for node group first-eks-nodegroup does not automatically assign public IPaddresses to instances launched into it. If you want your instances to be assigned a public IP address, then you need to enable auto-assign public IP address for the subnet. See IP addressing in VPC guide: https://docs.aws.amazon.com/vpc/latest/userguide/vpc-ip-addressing.html#subnet-public-ip,ResourceIds: [subnet-007964ce4a003361a, subnet-0a603a222db0cce10, subnet-007813cf58631ef3b]}]"
2021-08-28 12:30:36 [!]  1 error(s) occurred and cluster hasn't been created properly, you may wish to check CloudFormation console
2021-08-28 12:30:36 [ℹ]  to cleanup resources, run 'eksctl delete cluster --region=ap-northeast-2 --name=first-eks'
2021-08-28 12:30:36 [✖]  waiting for CloudFormation stack "eksctl-first-eks-nodegroup-first-eks-nodegroup": ResourceNotReady: failed waiting for successful resource state
Error: failed to create cluster "first-eks"

으아니.....서브넷에서 Public IP를 자동으로 붙이도록 해야한다니ㅠㅠ AWS양반 이게 무슨말이요....

나는 기본으로 끄도록 설정한다. 켜주고..

또 보니까 eks 를 생성명령어 치고 에러가 발생하면

eksctl delete cluster --region=ap-northeast-2 --name=first-eks
2021-08-28 12:35:42 [ℹ]  eksctl version 0.63.0
2021-08-28 12:35:42 [ℹ]  using region ap-northeast-2
2021-08-28 12:35:42 [ℹ]  deleting EKS cluster "first-eks"
2021-08-28 12:35:42 [ℹ]  deleted 0 Fargate profile(s)
2021-08-28 12:35:42 [✔]  kubeconfig has been updated
2021-08-28 12:35:42 [ℹ]  cleaning up AWS load balancers created by Kubernetes objects of Kind Service or Ingress
2021-08-28 12:35:43 [!]  retryable error (Throttling: Rate exceeded
        status code: 400, request id: 3c52ae23-c941-435c-82ef-4df78b0f706e) from cloudformation/DescribeStacks - will retry after delay of 5.632676043s
2021-08-28 12:35:50 [ℹ]  3 sequential tasks: { delete nodegroup "first-eks-nodegroup", 2 sequential sub-tasks: { 2 sequential sub-tasks: { delete IAM role for serviceaccount "kube-system/aws-node", delete serviceaccount "kube-system/aws-node" }, delete IAM OIDC provider }, delete cluster control plane "first-eks" [async] }
2021-08-28 12:35:50 [ℹ]  will delete stack "eksctl-first-eks-nodegroup-first-eks-nodegroup"
2021-08-28 12:35:50 [ℹ]  waiting for stack "eksctl-first-eks-nodegroup-first-eks-nodegroup" to get deleted
2021-08-28 12:35:50 [ℹ]  waiting for CloudFormation stack "eksctl-first-eks-nodegroup-first-eks-nodegroup"
2021-08-28 12:36:06 [ℹ]  waiting for CloudFormation stack "eksctl-first-eks-nodegroup-first-eks-nodegroup"
2021-08-28 12:36:06 [ℹ]  will delete stack "eksctl-first-eks-addon-iamserviceaccount-kube-system-aws-node"
2021-08-28 12:36:06 [ℹ]  waiting for stack "eksctl-first-eks-addon-iamserviceaccount-kube-system-aws-node" to get deleted
2021-08-28 12:36:06 [ℹ]  waiting for CloudFormation stack "eksctl-first-eks-addon-iamserviceaccount-kube-system-aws-node"
2021-08-28 12:36:24 [ℹ]  waiting for CloudFormation stack "eksctl-first-eks-addon-iamserviceaccount-kube-system-aws-node"
2021-08-28 12:36:24 [ℹ]  deleted serviceaccount "kube-system/aws-node"
2021-08-28 12:36:25 [ℹ]  will delete stack "eksctl-first-eks-cluster"
2021-08-28 12:36:25 [✔]  all cluster resources were deleted

자동으로 삭제하진 않고 내가 수동으로 삭제해야한다. 삭제를 하면 다시 설치!! 설치가 완료됬다.

이제 pgsql rds와 secretmanager 셋팅을 할거다.

t2.micro로 생성하고

Secrets Manager 도 생성했다.

rds endpoint 도 변수로 추가하고 보안그룹 열어주고 pgsql 유저 패스워드를 지정한다

RDSEP=eksworkdb.cnnbttekipxl.ap-northeast-2.rds.amazonaws.com
createuser -d -U eksdbadmin -P -h $RDSEP mywork
Enter password for new role:
Enter it again:
Password:
#디비 생성
PGPASSWORD=$AppDbPw createdb -U mywork -h $RDSEP -E UTF8 myworkdb

이후로는 책의 진행을 따라서 backend-app 까지 배포했다.

ubectl logs -l app=backend-app -f --max-log-requests 8
2021-08-28 14:00:12.504 [http-nio-8080-exec-7] INFO  k.s.presentation.api.HealthApi - Health GET API called.
2021-08-28 14:00:12.507 [http-nio-8080-exec-8] INFO  k.s.presentation.api.HealthApi - Health GET API called.
2021-08-28 14:00:42.503 [http-nio-8080-exec-3] INFO  k.s.presentation.api.HealthApi - Health GET API called.
2021-08-28 14:00:42.505 [http-nio-8080-exec-5] INFO  k.s.presentation.api.HealthApi - Health GET API called.
2021-08-28 14:01:12.503 [http-nio-8080-exec-5] INFO  k.s.presentation.api.HealthApi - Health GET API called.
2021-08-28 14:01:12.503 [http-nio-8080-exec-4] INFO  k.s.presentation.api.HealthApi - Health GET API called.
2021-08-28 14:01:42.503 [http-nio-8080-exec-1] INFO  k.s.presentation.api.HealthApi - Health GET API called.
2021-08-28 14:01:42.505 [http-nio-8080-exec-2] INFO  k.s.presentation.api.HealthApi - Health GET API called.
2021-08-28 14:02:12.508 [http-nio-8080-exec-8] INFO  k.s.presentation.api.HealthApi - Health GET API called.
2021-08-28 14:02:12.513 [http-nio-8080-exec-9] INFO  k.s.presentation.api.HealthApi - Health GET API called.

정상적으로 들어오는거 확인하고~ 프론트를 빌드했다.

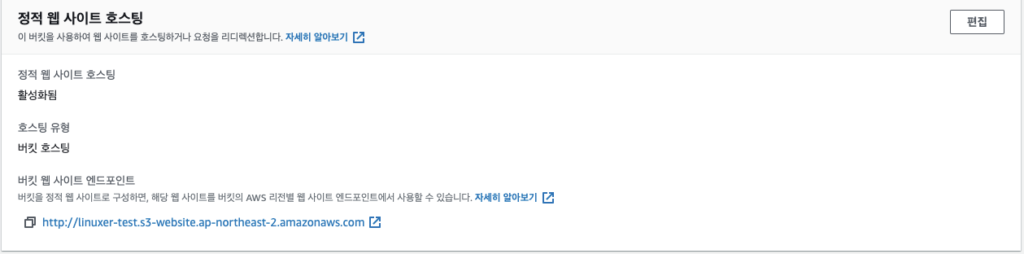
이후에 빌드한 것을 s3 로 정적호스팅 설정하고,

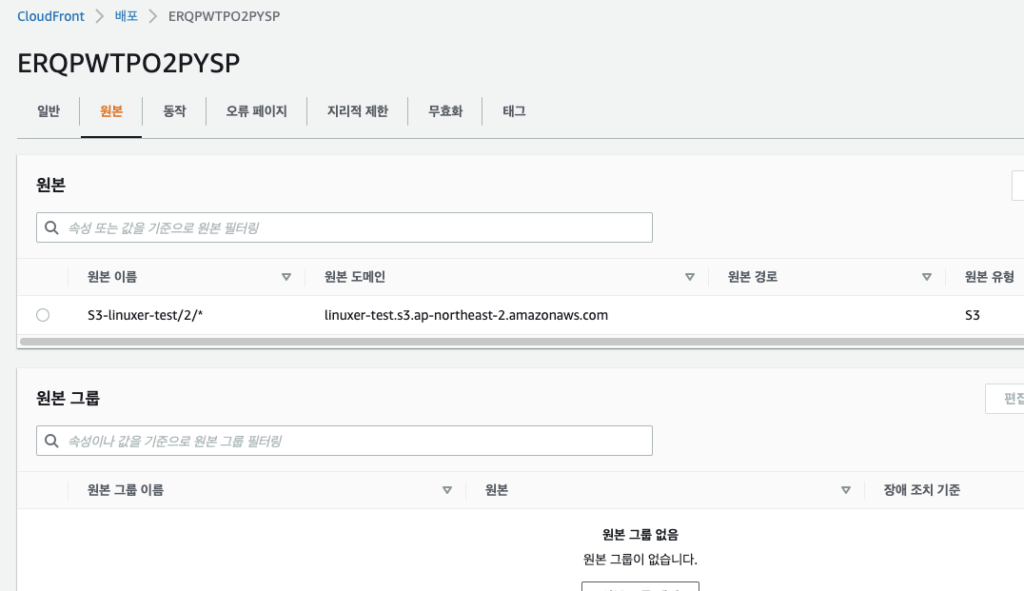
OAI 설정 및 연결해주고..대부분 기본설정이다.

이전에 만든 CF를 썼는데 원본이름이 이상하다...
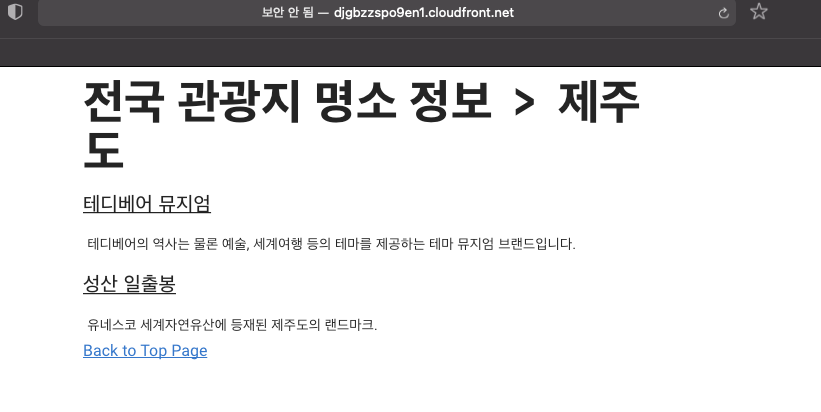
일단 정적페이지 까지 띄웠다.

생각보다 긴 실습이었다.

eksctl delete cluster --region=ap-northeast-2 --name=first-eks
2021-08-28 14:28:19 [ℹ]  eksctl version 0.63.0
2021-08-28 14:28:19 [ℹ]  using region ap-northeast-2
2021-08-28 14:28:19 [ℹ]  deleting EKS cluster "first-eks"
2021-08-28 14:28:20 [ℹ]  deleted 0 Fargate profile(s)
2021-08-28 14:28:20 [✔]  kubeconfig has been updated
2021-08-28 14:28:20 [ℹ]  cleaning up AWS load balancers created by Kubernetes objects of Kind Service or Ingress
2021-08-28 14:29:57 [!]  retryable error (Throttling: Rate exceeded
        status code: 400, request id: 79716aac-f9df-40d9-871c-e473113fe5c1) from cloudformation/DescribeStacks - will retry after delay of 9.550890926s
2021-08-28 14:30:06 [ℹ]  3 sequential tasks: { delete nodegroup "first-eks-nodegroup", 2 sequential sub-tasks: { 2 sequential sub-tasks: { delete IAM role for serviceaccount "kube-system/aws-node", delete serviceaccount "kube-system/aws-node" }, delete IAM OIDC provider }, delete cluster control plane "first-eks" [async] }
2021-08-28 14:30:06 [ℹ]  will delete stack "eksctl-first-eks-nodegroup-first-eks-nodegroup"
2021-08-28 14:30:06 [ℹ]  waiting for stack "eksctl-first-eks-nodegroup-first-eks-nodegroup" to get deleted
2021-08-28 14:30:06 [ℹ]  waiting for CloudFormation stack "eksctl-first-eks-nodegroup-first-eks-nodegroup"
2021-08-28 14:30:23 [ℹ]  waiting for CloudFormation stack "eksctl-first-eks-nodegroup-first-eks-nodegroup"
2021-08-28 14:30:40 [ℹ]  waiting for CloudFormation stack "eksctl-first-eks-nodegroup-first-eks-nodegroup"
2021-08-28 14:30:59 [ℹ]  waiting for CloudFormation stack "eksctl-first-eks-nodegroup-first-eks-nodegroup"
2021-08-28 14:31:16 [ℹ]  waiting for CloudFormation stack "eksctl-first-eks-nodegroup-first-eks-nodegroup"
2021-08-28 14:31:36 [ℹ]  waiting for CloudFormation stack "eksctl-first-eks-nodegroup-first-eks-nodegroup"
2021-08-28 14:31:55 [ℹ]  waiting for CloudFormation stack "eksctl-first-eks-nodegroup-first-eks-nodegroup"
2021-08-28 14:32:14 [ℹ]  waiting for CloudFormation stack "eksctl-first-eks-nodegroup-first-eks-nodegroup"
2021-08-28 14:32:31 [ℹ]  waiting for CloudFormation stack "eksctl-first-eks-nodegroup-first-eks-nodegroup"
2021-08-28 14:32:49 [ℹ]  waiting for CloudFormation stack "eksctl-first-eks-nodegroup-first-eks-nodegroup"
2021-08-28 14:33:05 [ℹ]  waiting for CloudFormation stack "eksctl-first-eks-nodegroup-first-eks-nodegroup"
2021-08-28 14:33:21 [ℹ]  waiting for CloudFormation stack "eksctl-first-eks-nodegroup-first-eks-nodegroup"
2021-08-28 14:33:40 [ℹ]  waiting for CloudFormation stack "eksctl-first-eks-nodegroup-first-eks-nodegroup"
2021-08-28 14:33:56 [ℹ]  waiting for CloudFormation stack "eksctl-first-eks-nodegroup-first-eks-nodegroup"
2021-08-28 14:33:56 [ℹ]  will delete stack "eksctl-first-eks-addon-iamserviceaccount-kube-system-aws-node"
2021-08-28 14:33:56 [ℹ]  waiting for stack "eksctl-first-eks-addon-iamserviceaccount-kube-system-aws-node" to get deleted
2021-08-28 14:33:56 [ℹ]  waiting for CloudFormation stack "eksctl-first-eks-addon-iamserviceaccount-kube-system-aws-node"
2021-08-28 14:34:13 [ℹ]  waiting for CloudFormation stack "eksctl-first-eks-addon-iamserviceaccount-kube-system-aws-node"
2021-08-28 14:34:13 [ℹ]  deleted serviceaccount "kube-system/aws-node"
2021-08-28 14:34:14 [ℹ]  will delete stack "eksctl-first-eks-cluster"
2021-08-28 14:34:14 [✔]  all cluster resources were deleted

클러스터를 삭제하며 포스팅을 마친다.

AWS-CLF-Practitioner

https://www.aws.training/LearningLibrary

AWS 의 기초학습은 먼저 AWS training ang certification 에서 진행한다.

Amazon 계정이 필요하며 로그인후

클라우드 실무자

한국어로 정렬한다.

그럼 초보자를 위한 학습리스트가 보인다. 모두듣자.

그다음은 내 블로그에서 여러번 소개된 인도아저씨 블로그를 참고하자.

Jayendra 님은 나를 AWS로 이끌어주는데 아주 많은 일조를 하신분이다.
항상 감사하는중. 언제 한번 계획을 세워 감사인사를 할 계획.

https://jayendrapatil.com/aws-certified-cloud-practitioner-exam-learning-path/

SAA 포스팅을 추가로 넣은이유는 경계가 애매하기 때문이다.

그래서 같이보는것도 좋다.

공부할때 참고하길 바라며 궁금하거나 알고싶은건 언제나 댓글이나,

https://open.kakao.com/o/gMCqYXxb

오픈카톡으로 들어와서 질문하여도 좋다!

건승하시라!