이전 포스팅에서 cloud shell 을 이용해서 terraform 을 사용하는 방법을 포스팅 했다.
이번에는 VPC 를 생성하는 방법을 포스팅 하기로 하였다.
https://www.terraform.io/docs/providers/google/r/compute_subnetwork.html
다음 docs 를 참고하였다.
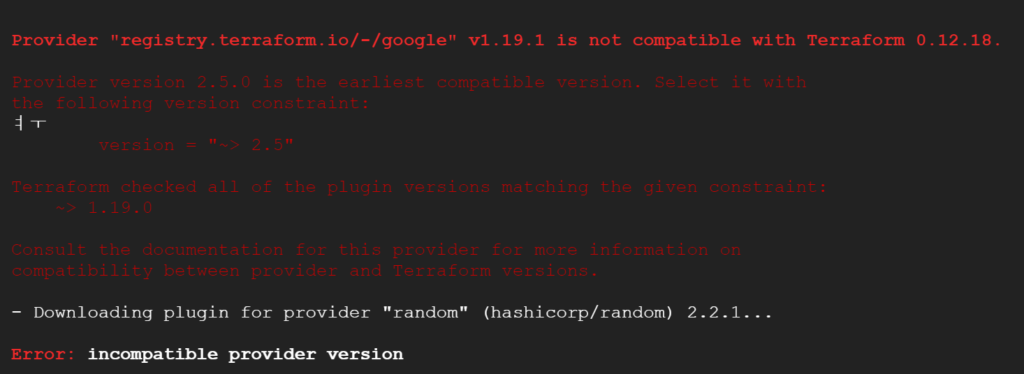
resource name -실제 vpc name -에 대문자가 들어가면
Error: Error creating Network: googleapi: Error 400: Invalid value for field 'resource.name'
에러가 발생한다 참고하자.
이걸 몰라서 한참..테스트를 했다.
main.tf
resource "google_compute_subnetwork" "us-central1-subnet" {
name = "${local.name_suffix}-us-central1-subnet"
ip_cidr_range = "10.2.0.0/16"
region = "us-central1"
network = google_compute_network.linuxer-VPC.self_link
}
resource "google_compute_subnetwork" "europe-west1-subnet" {
name = "${local.name_suffix}-europe-west1-subnet"
ip_cidr_range = "10.3.0.0/16"
region = "europe-west1"
network = google_compute_network.linuxer-VPC.self_link
}
resource "google_compute_network" "linuxer-VPC" {
name = "${local.name_suffix}-vpc"
auto_create_subnetworks = false
}
backing_file.tf - provider 에서 리전을 지정하지 않아도 된다고 하는데 지정해주었다.
locals {
name_suffix = "linuxer"
}
provider "google" {
region = "us-central1"
zone = "us-central1-c"
}
VPC : linuxer-vpc
linuxer-us-central1-subnet us-central1 / 10.2.0.0/16
linuxer-europe-west1-subnet europe-west1 / 10.3.0.0/16
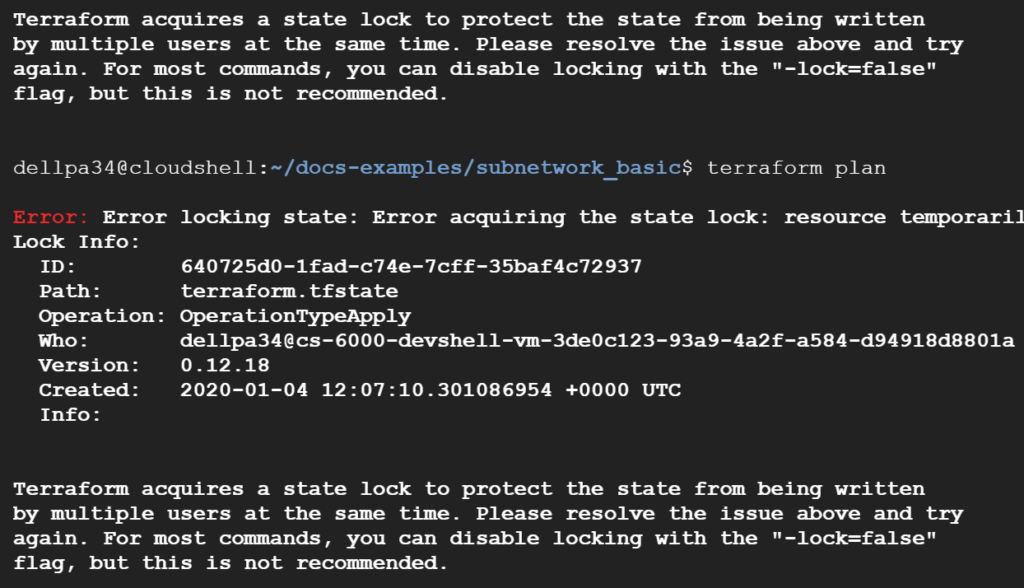
Error: Error locking state: Error acquiring the state lock: resource temporarily unavailable
Lock Info:
ID: 640725d0-1fad-c74e-7cff-35baf4c72937
Path: terraform.tfstate
Operation: OperationTypeApply
Who: dellpa34@cs-6000-devshell-vm-3de0c123-93a9-4a2f-a584-d94918d8801a
Version: 0.12.18
Created: 2020-01-04 12:07:10.301086954 +0000 UTC
Info:
Terraform acquires a state lock to protect the state from being written
by multiple users at the same time. Please resolve the issue above and try
again. For most commands, you can disable locking with the "-lock=false"
flag, but this is not recommended.
테스트중에 캔슬 한번했더니 프로세스가 종료되지 않아서 자꾸 -lock=false 옵션을 주라고 떳다. 귀찮아서 그냥 죽였다. kill -9 4120
dellpa34 284 0.0 0.3 23080 6800 pts/1 S<s 18:01 0:00 _ -bash
dellpa34 4120 0.0 1.7 151504 29856 pts/1 T<l 21:07 0:00 _ terraform destroy
dellpa34 4123 0.1 3.0 153232 52824 pts/1 T<l 21:07 0:01 | _ /usr/local/bin/terraform destroy
dellpa34 4179 0.0 2.1 153020 37296 pts/1 T<l 21:07 0:00 | _ /home/dellpa34/docs-examples/subnetwork_basic/.terraform/plugins/linux_amd64/terraform-provider-google_v3.3.0_x5
dellpa34 4186 0.0 1.3 124688 22536 pts/1 T<l 21:07 0:00 | _ /home/dellpa34/docs-examples/subnetwork_basic/.terraform/plugins/linux_amd64/terraform-provider-random_v2.2.1_x4
dellpa34 4462 0.0 0.1 38304 3200 pts/1 R<+ 21:17 0:00 _ ps afxuwww
dellpa34@cloudshell:~/docs-examples/subnetwork_basic$ kill -9 4120
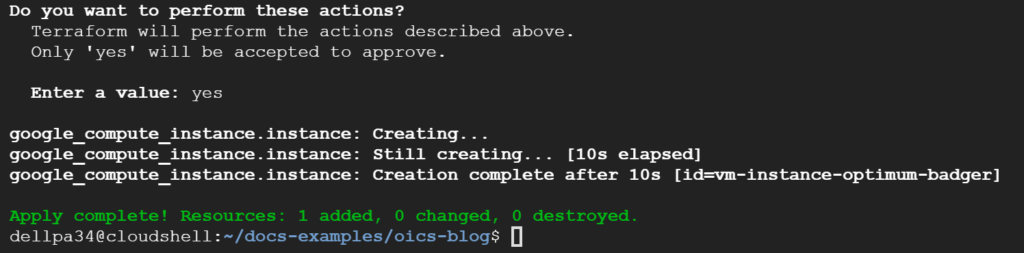
프로세스를 죽이고 apply 하여 정상적으로 생성되는것을 확인하였다.

대문자..-_-;;

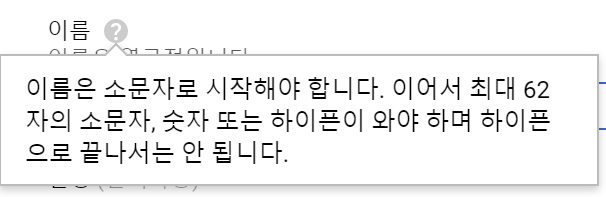
일단 테라폼에서 vpc 생성할때 대문자는 안된다.
GUI에서도 대문자 사용은 불가하네..좋은걸 알았다..
내두시간..!